Enclosure for FABOOL laser mini |
Sep. 30/2018 Half a year has passed since I made the enclosure. Although there is no big problem, we small remodeling so that it is easier to use. |
 |
 |
|
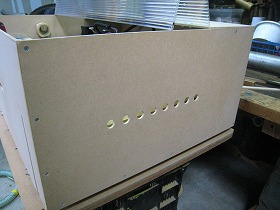
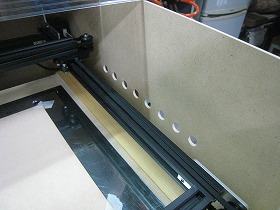
1.This is an air intake for cooling. I added it to the right side as it seems that the suction area is insufficient. |
2.Opend 8 holes with a diameter of 15mm. |
|
 |
 |
|
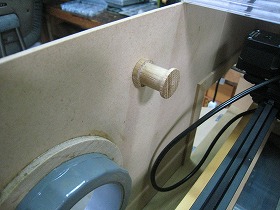
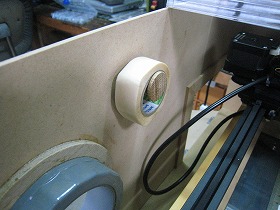
3.When the material is a thin material such as paper, it is common to temporarily fix with a drafting tape. I attached a hanger to hang the tape there. |
4.I think the material of the hanger is chestnut. |
|
 |
 |
|
5.Power switch is not attached to the laser machine. I wanted to turn on and off the power supply frequently, so I installed an line switch. |
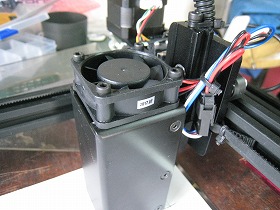
6.I exchanged the laser head to 3.5W. The cutting ability has improved dramatically. |
|
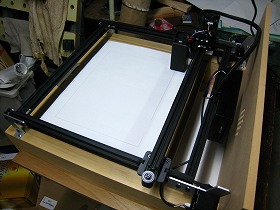
Mar. 11/2018 I bought a laser cut machine FABOOL laser mini 1.6W. Since smoke and smell come out from the machine more than expected, I made an enclosure with a slide table.Drawing of Machine,Drawing of Enclosure |
 |
 |
|
1.First, Assembled and check accuracy of XY axis movement. |
2.Y-axis pulley end side. |
|
 |
 |
|
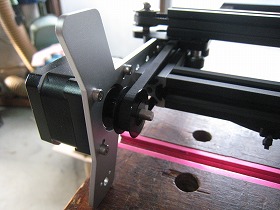
3.Y axis right side motor end side. |
4.Y axis left side motor end and X axis motor parts. |
|
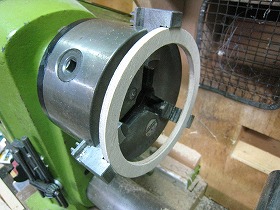
 |
 |
|
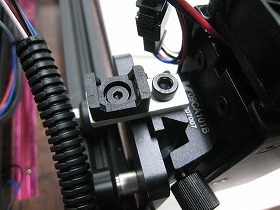
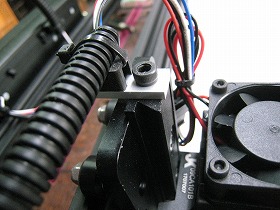
5.Laser part. If you attach the corrugated tube according to the instructions, it stood up and hit the ceiling of the enclosure. |
6.Therefore, I made an attachment to make the orientation of the corrugated tube horizontal. |
|
 |
 |
|
7.Attach the binding band fastener to the attachment. And attach it to the laser cover. |
8.The corrugated tube turned sideways. |
|
 |
 |
|
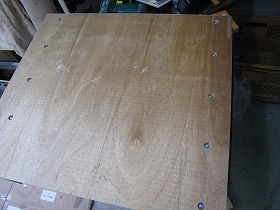
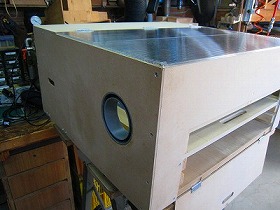
9.Base plate bof the enclosure. The material is 18 mm thick plywood. |
10.This is the rail for the work table. |
|
 |
 |
|
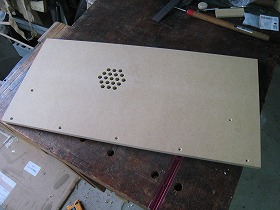
11.The back plate of the enclosure. It is a 12 mm thick MDF board. |
12.Cut the rail grooves using a 12 mm bit. |
|
 |
 |
|
13.Left and right rails are completed. |
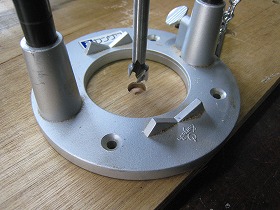
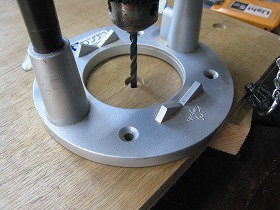
14.Drilling 12mm * depth5mm in the back of the base plate with a foster bit. |
|
 |
 |
|
15.Drilling 4mm. |
16.Drilling 2.5 mm hole on the rail side. |
|
 |
 |
|
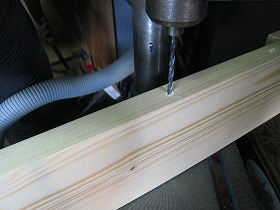
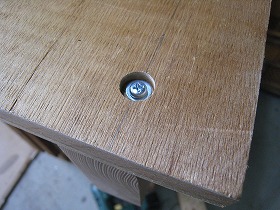
17.The back side of the base plate. Fix the rail to the base plate with 4 x 40 L wood screw. |
18.Details of wood thread part. |
|
 |
 |
|
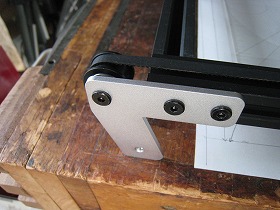
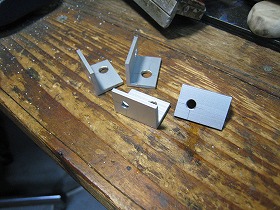
19.This part is for fixing the laser machine on the rail. Aluminum 15 mm ~ 2 t. |
20.This is a bracket for use with a leg with a protective limit switch. It has a hole to release the M2 bolt for mounting the limit switch. |
|
 |
 |
|
21.After fixing the laser machine, move the machine and check for problems. |
22.This is a slide table that carries works. Make the tip round to make it easy to insert. MDF 12 mm thick. |
|
 |
 |
|
23.Groove of the handle. |
24.Paste 0.5 mm thick SUS430 to the table with double-sided tape. This stainless steel plate attracts to the magnet. |
|
 |
 |
|
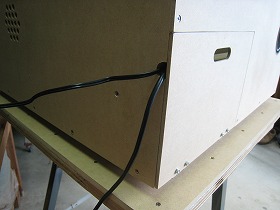
25.The rear plate has an air intake hole for the cooling fan. |
26.The left side plate is a 4 mm thick MDF board. Cut the portion to be the door with the jig saw to store the USB cable and the power supply. The cut part can be used as it is as a door. |
|
 |
 |
|
27.Also the left side plate. Cut out the hole to attach the PVC part of the exhaust port. Polish the hole with spindle sander. |
28.Front board. Cut the door part for putting in and out the table with the jig saw. |
|
 |
 |
|
29.Glueing the mounting stay for attaching the side plate to the front plate. Material is MDF 12 mm thick. |
30.Handle groove to the front and left side door plates. |
|
 |
 |
|
31.Put down a waste board under the workpiece. |
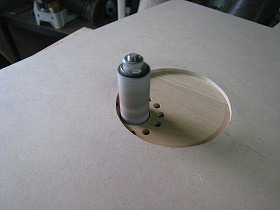
32.Dust port is 75A VU. |
|
 |
 |
|
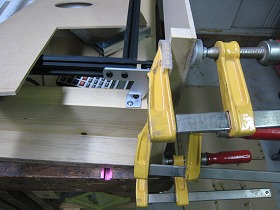
33.Make a step of 0.5 mm on the surface, to eliminate the gap at the time of bonding with the outer ring. |
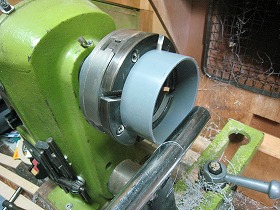
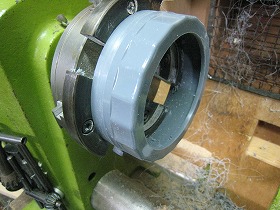
34.Make the outer ring from 100A VU cap. |
|
 |
 |
|
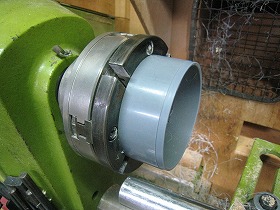
35.On the contrary grab, and Turning a hole to enter the dust- port. |
36.This is an attachment ring for glueing the outer ring to the left side plate. 5.5 mm plywood. |
|
 |
 |
|
37.Glue the dust port to the left side plate.View the behind. |
38.View the front. The dust port is not protruding. |
|
 |
 |
|
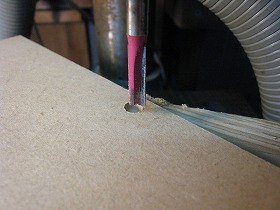
39.Drilling to door plate for in the neodymium magnet. Outer diameter 6 mm Depth 3 mm. |
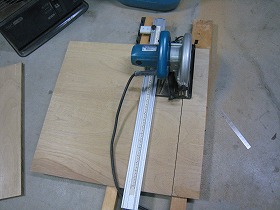
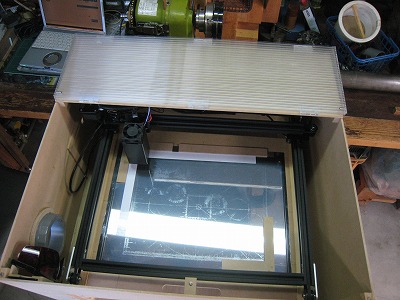
40.The top cover is a 4.4 mm thick hollow polycarbonate. Cutting in the longitudinal direction with plastic special blade. |
|
 |
 |
|
41.Cross cut. |
42.Hinge uses six plastic items. Use adhesive only for polycarbonate. |
|
 |
 |
|
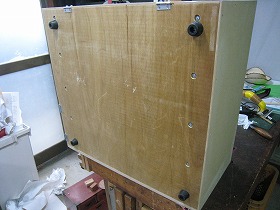
43.Screw the side plate and attach the rubber feet to the back side of the base plate. |
44.About 1/4 of the top cover uses 4 mm MDF board. Fixed Hinge connect MDF and polycarbonate with M 3 * 10 L screws. |
|
 |
 |
|
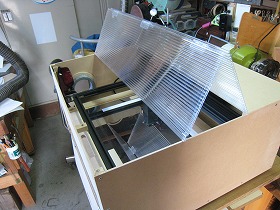
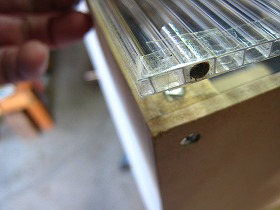
45.Polycarbonate board can be folded. And it can be put on top cover of MDF. |
46.Put the SS400 pipe with 3 mm outside diameter at the tip of polycarbonate. The neodymium magnet embedded in the front cover that sticks this pipe. |
|
 |
 |
|
47.On the left inner side of the front cover has a space for storing protective glasses and acrylic plates for clearance adjustment. |
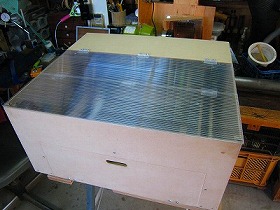
48.View the front. The front handle also serves as an air intake. |
|
 |
 |
|
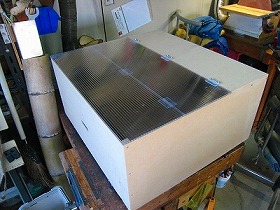
49.View Left side. |
50.The state with the front cover open. The sliding table is inserted in the top rail. |
|
 |
 |
|
51.Keep the works on the table and put it in and out. Therefore, I think that the positioning accuracy of the works will increase. |
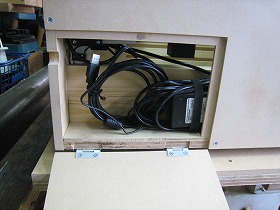
52.View left side. Cables are stored in the back door. |
|
 |
 |
|
53.Stowed the cable. |
54.When pulling out the cable, use the cable port on the semicircle to close the door. |
|
 |
||
View inside fold the cover of polycarbonate. |
||
 |
||
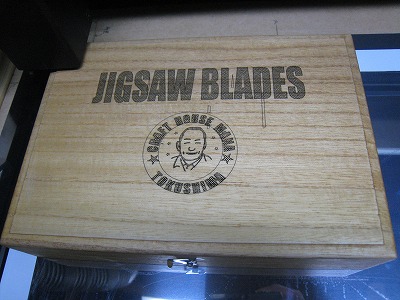
Engraved on the blade case of the jig saw by trial operation. |
||
 |
||
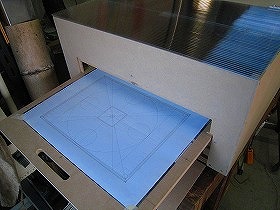
I could mark it but there is a bug in hatching. It seems there was a problem with how to use inkscape. There seems to be need for improvement. |
||
 |
||
When I rebuilt the data and adjust the speed and irradiation amount, it became a nice feeling brand mark. |
||