Marbles toy similar to "cuboro" |
 |
 |
|
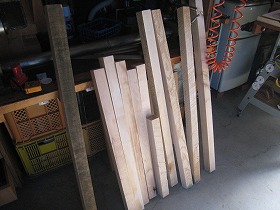
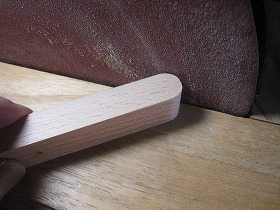
1.Materials are soft maple and ash. |
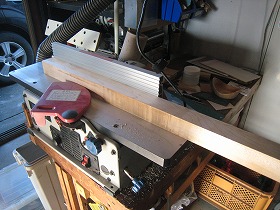
2.Make a right angle use the planner. |
|
 |
 |
|
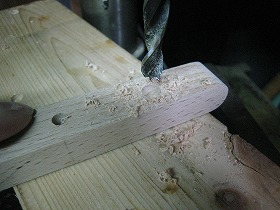
3.Use an automatic plane to finish to 50 mm square. |
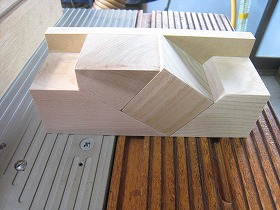
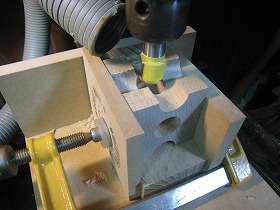
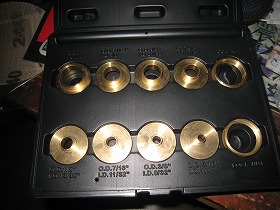
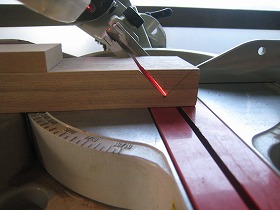
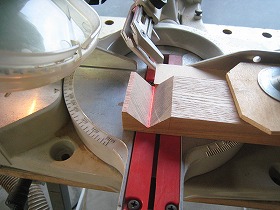
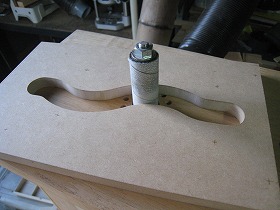
4.Carve out the groove first in only one of the materials. The bit was purchased in a "digram" on the sphere 19mm * 1/2". |
|
 |
 |
|
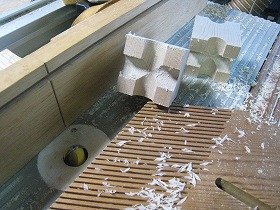
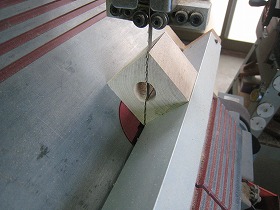
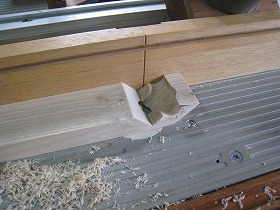
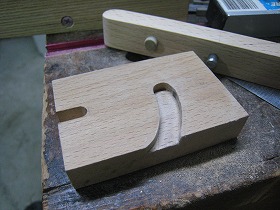
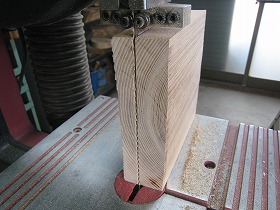
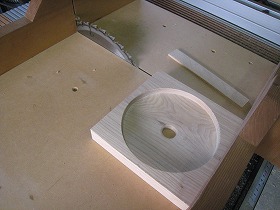
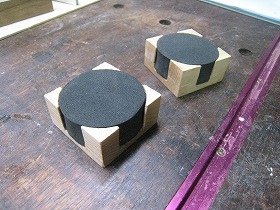
5.Cut it to 50 mm square with a table saw. |
6.About 140 dice. |
|
 |
 |
|
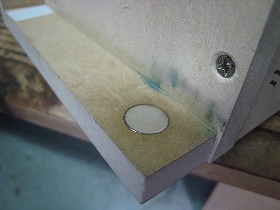
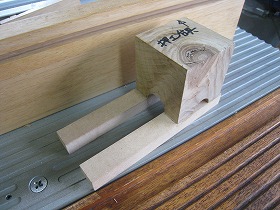
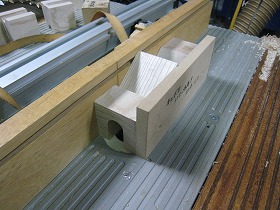
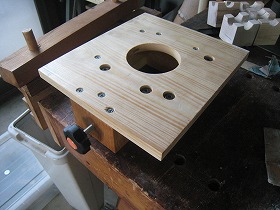
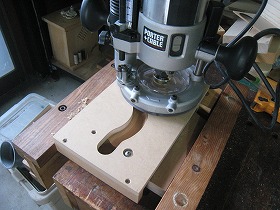
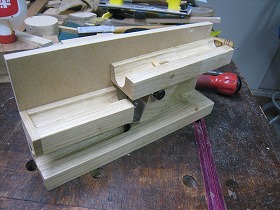
7.From now on making jigs. Firstly, making the base part of jigs -1 and 2 used 12 mm thick MDF. |
8.This base is designed to stick to the drill table. |
|
 |
 |
|
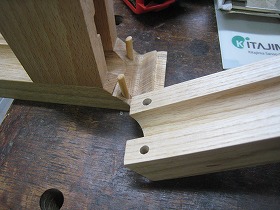
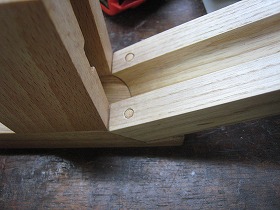
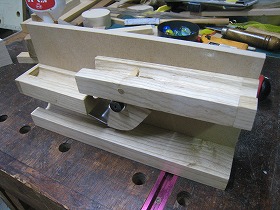
9.Because it contains two neodymium magnets of 13 mm in the part along the table side of the drilling machine. |
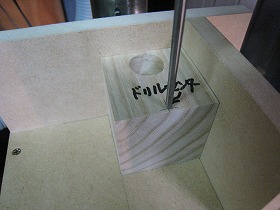
10.Mark the piece that will become the center jig. When you move the table, use this to bring the table back to the center. |
|
 |
 |
|
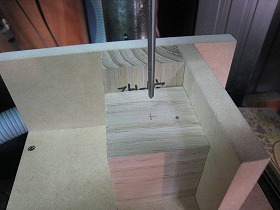
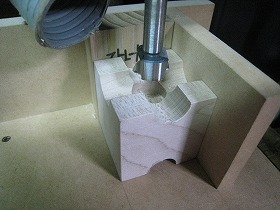
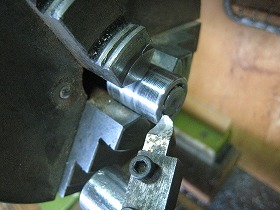
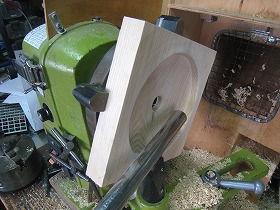
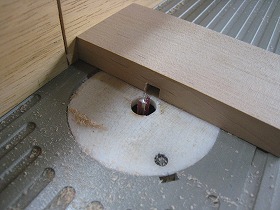
11.This is a 22.5 mm spacer used to drill a hole in the center position of the dice. The thickness is 22.5 mm. |
12.When inserting the spacer, the center of the drill center and the work center match. |
|
 |
 |
|
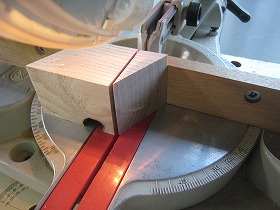
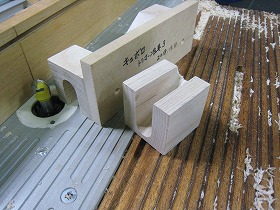
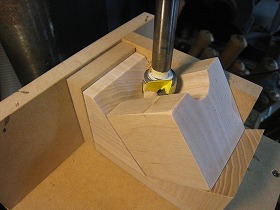
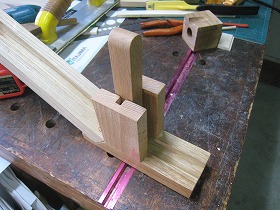
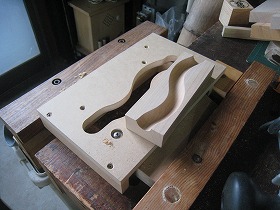
13.Make triangular pieces with different angles for jigs 2,3 and 4 with slide saws. Because it is a delicate angle mark the angular line on the work with a digital ruler. |
14.Completion of jigs 2, 3, 4. |
|
 |
 |
|
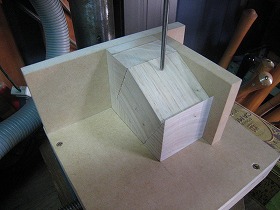
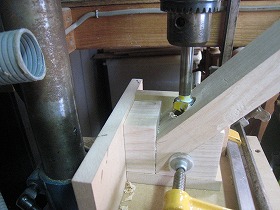
15.The back side part of jig-2. |
16.When opening a hole, press the work piece with the triangular piece in front. |
|
 |
 |
|
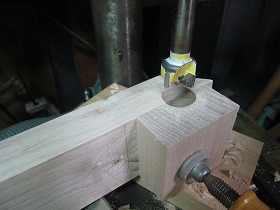
17.Work in this way (actually with a Fostner bit). |
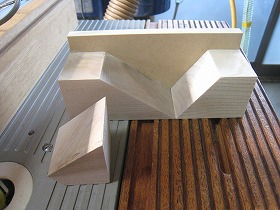
18.This is jig-3 used when cutting oblique grooves. |
|
 |
 |
|
19.When using, do set the workpiece like this. |
20.This is a jig-4 to cut a shallow groove. The angle of the workpiece is loosened. |
|
 |
 |
|
21.It is cross groove processing. |
22.Use such jigs to cut straight grooves safely. The drawing is not shown. |
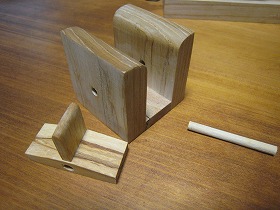
|
 |
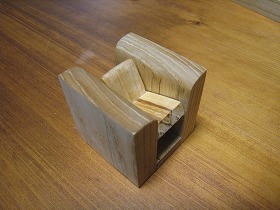
 |
|
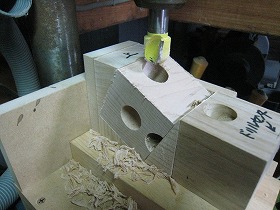
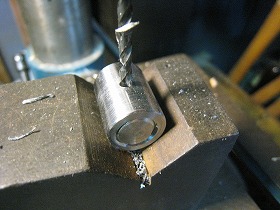
23.Straight drilling with Forstner bit. Since it penetrates, lay down a waste board under the workpiece. |
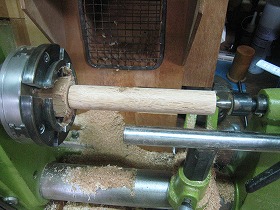
24.Use the forstner bit for the preliminary bending of 90 degrees. |
|
 |
 |
|
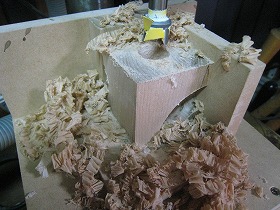
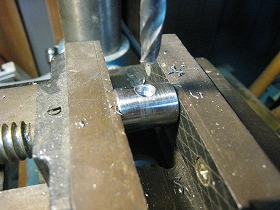
25.Similarly rilling the 90 degree side of the same work. |
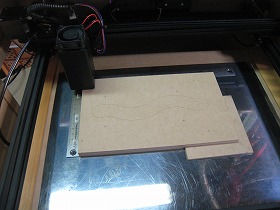
26.Useing 19 mm spherical bit make on the center. Since there is vibration, fix it firmly with clamp. |
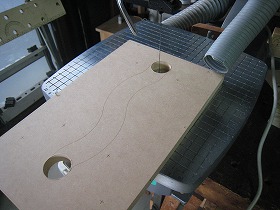
|
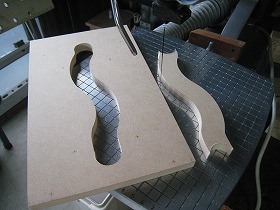
 |
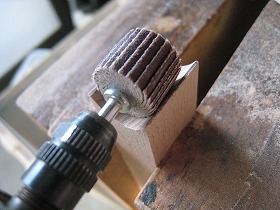
 |
|
27.Drill a hole similarly on the opposite side of 90 degrees. |
28.Making 90 degree twis-hole using jig-2. |
|
 |
 |
|
29.The forstner bit used 3/4 "of steel. However, when dozens of holes are drilled, the sharpness becomes worse.So I bought a 19mm bit of carbide. |
30.This piece is goal part. Use the 40 mm forstner bit. |
|
 |
 |
|
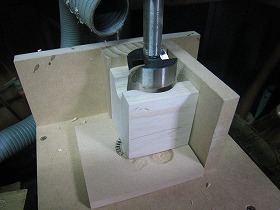
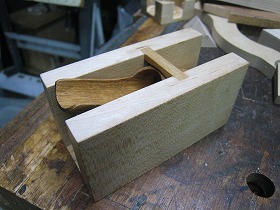
31.Use Jig-3 to cut oblique deep grooves with a router. |
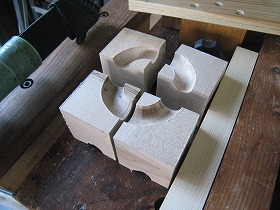
32.Block of oblique deep grooves. |
|
 |
 |
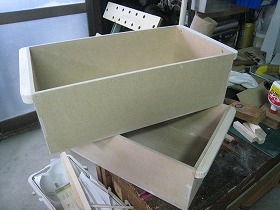
|
33.This is a shallow groove piece using jig-4. |
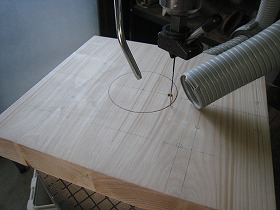
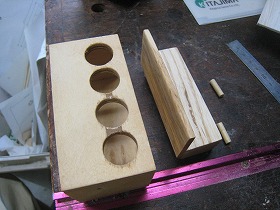
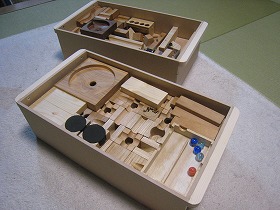
34.Production of jig-7. First of all, open a 69 mm hole in the table face with a fret saw. |
|
 |
 |
|
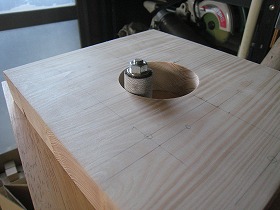
35.Grind the spindle thunder. |
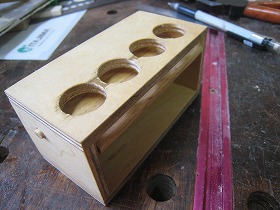
36.The table was completed with the installation hole of the stay open. |
|
 |
 |
|
37.I tried assembling and trying it, but since I made it to use a 19 mm bearing in a bit of 19 mm, it turned out to be very dangerous to set while rotating the bit. |
38.So I bought a template guide for the router. |
|
 |
 |
|
39.Corrected the thickness of the table. because bits will not fall by the thickness of the template.30 mm to 15 mm. Also, after cutting it is put out a plane with drum sander. |
40.Reassembly is completed. |
|
 |
 |
|
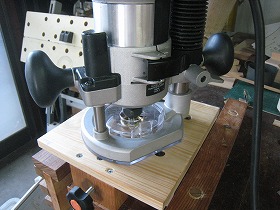
41.Slide the router on the jig. |
42.A round groove was made. |
|
 |
 |
|
43.Divide pieces of straight holl into two with a band saw. |
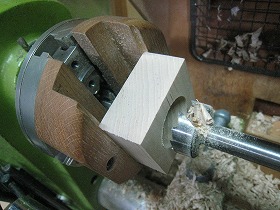
44.Make a piece to use for the start position. Grab a piece with a straight hole with a Tow-Jaw chuck and push it at the taper center. |
|
 |
 |
|
45.Turn the interior tapering. |
46.Use jig-5 to open a straight hole that goes 90 degrees diagonally from the center. |
|
 |
 |
|
47.From here, it is a prototype of "hit" that will launch marbles with centrifugal force. First of all, the tip of the "Hit-1" ramp part to be launched at an angle of 45 degrees is cut to 45 degrees using a mitre jig. |
48.Drilling 45 degrees hole using Jig-6. |
|
 |
 |
|
49.Drilling half hole of 19 mm using a waste board. |
50.Cut the V groove of the base part with a slide saw. First cut the left part. |
|
 |
 |
|
51.Cut by inverting the workpiece. |
52.Make the inside V groove of the ramp end in the same way. |
|
 |
 |
|
53.Groove processing of ramp part. |
54.This bit is 19mm. |
|
 |
 |
|
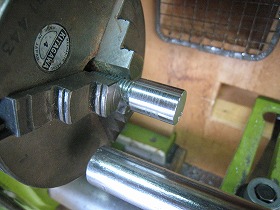
55.Counter weights use 3/8 "long nuts and bolts.The long nut is first cut with a saw with a length of 14 mm. |
56.Tighten 3/8"*45 L bolts firmly into the cut nut. Then chuck to the drill and sanding with belt sander in a rough cylindrical shape. |
|
 |
 |
|
57.Turning the surface. |
58.Turning the end face. |
|
 |
 |
|
59.Drilling 3.4mm. |
60.Spot faceing 6mm. |
|
 |
 |
|
61.Sanding the end face of the rotating bar. |
62.Sanding on the other side with disc sander. |
|
 |
 |
|
63.Drilling 6mm. |
64.Make 8 mm spot faceing for hold the locking pin. |
|
 |
 |
|
65.This is the stay that supports the rotating bar.Groove for the pin in with the trimmer. |
66.Assembly of parts. This part was planned to raise the marble to 200 mm in height, but the batting power was weak or the success rate was low.So I modified all the parts for hit-2. Completion of assembly of hit-2. This is a state that takes weights to the top and is on standby. |
|
 |
 |
|
67.Weight is falling. The movie is posted on the last part. |
68.The body moves slightly due to vibration by a hammer. As a countermeasure to that, I struck a 5 mm pin on the body base and the ramp. |
|
 |
 |
|
69.The lamp is inserted in the base. |
70.Since the exit of the ramp also moves, we added an aluminum plate sandwiching the block. |
|
 |
 |
|
71.Make a "tornado-1". I did not have the right thickness, so I broke a 40 mm board into 25 mm with a band saw. |
72.Grasp with four jaw chuck, drilled 19mm in the center. |
|
 |
 |
|
73.This chuck was attached when I bought a lathe. |
74.Turning on the inside. |
|
 |
 |
|
75.Cut the end face and make it 150 mm squares. |
76.This is a "tornado-2". It is 100 mm squares. |
|
 |
 |
|
77.Make jig-8. Mark the cutting position with a laser machine in the template. |
78.Material is 12 mm MDF. Drill 1" at both ends with forstner bit before cutting. |
|
 |
 |
|
79.Cut by fret saw. |
80.Sanding by spindle sander. |
|
 |
 |
|
81.Grooving with 19 mm spherical bit. |
82.Using a jig can easily engrave grooves. |
|
 |
 |
|
83.Make a "pop".Drilling 30mm. |
84.Drilling 50mm. |
|
 |
 |
|
85.It is completed by inserting natural rubber sponge. The sponge was sold at the home center. |
86.The project has come close to the end. Make a "catapult" that strikes marbles one after another. Each part is made of 9 mm MDF board and 20 mm japanese-ash parts. |
|
 |
 |
|
87.The part which receives the marble of the escapement was made of 1 t aluminum. Put a little cut at both ends of the aluminum. And it is bent to the center to make it rounded. |
88.Assembly. The angle of the right side rail can be adjusted. It is necessary to actually find marbles entering and smoothly flowing angles. If the angle is made sharp, the surface pressure will increase and the extrusion pin will not move. |
|
 |
 |
|
89.The left rail is fixed with one screw. By changing the angle of this rail, you can change the pitch of the kicking of the marbles. |
90.I tried moving it and it was more interesting than I expected. Let's also introduce this with animation. |
|
 |
 |
|
91.Make a "return". When four cylindrical marbles enter, it reverses. First of all, make a round bar with an outer diameter of 24 mm. |
92.Drlling 19mm. |
|
 |
 |
|
93.Grooving to the stay receiving the revolving fulcrum. It's 6 mm bit. |
94.After assembling, confirm that there is no problem in movement, cover the top of the groove which receives the fulcrum with a 6 mm square member. Please watch the animation. |
|
 |
 |
|
95.Make a "bench". When the marbles enter the four grooves, the bench flips and releases the marbles to the lower side. |
96.Assembly. This bench was popular with grandchildren. Please watch the this animation,too. |
|
 |
 |
|
97.This is a "seesaw" that distributes marbles to the left and right. |
98.It would be nice to put this on the exit side of "catapult". |
|
 |
 |
|
99.Making box. |
100.When we put the parts in a box, it's a weight that children can not hold. |
|
 |
 |
|
101.There was a request to colorfully paint the box. then painted red and yellow. and stenciled my grandson favorite Ultraman. |
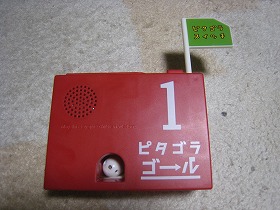
102.Commercially available hPitagora switch" goal-box. |
|
 |
||
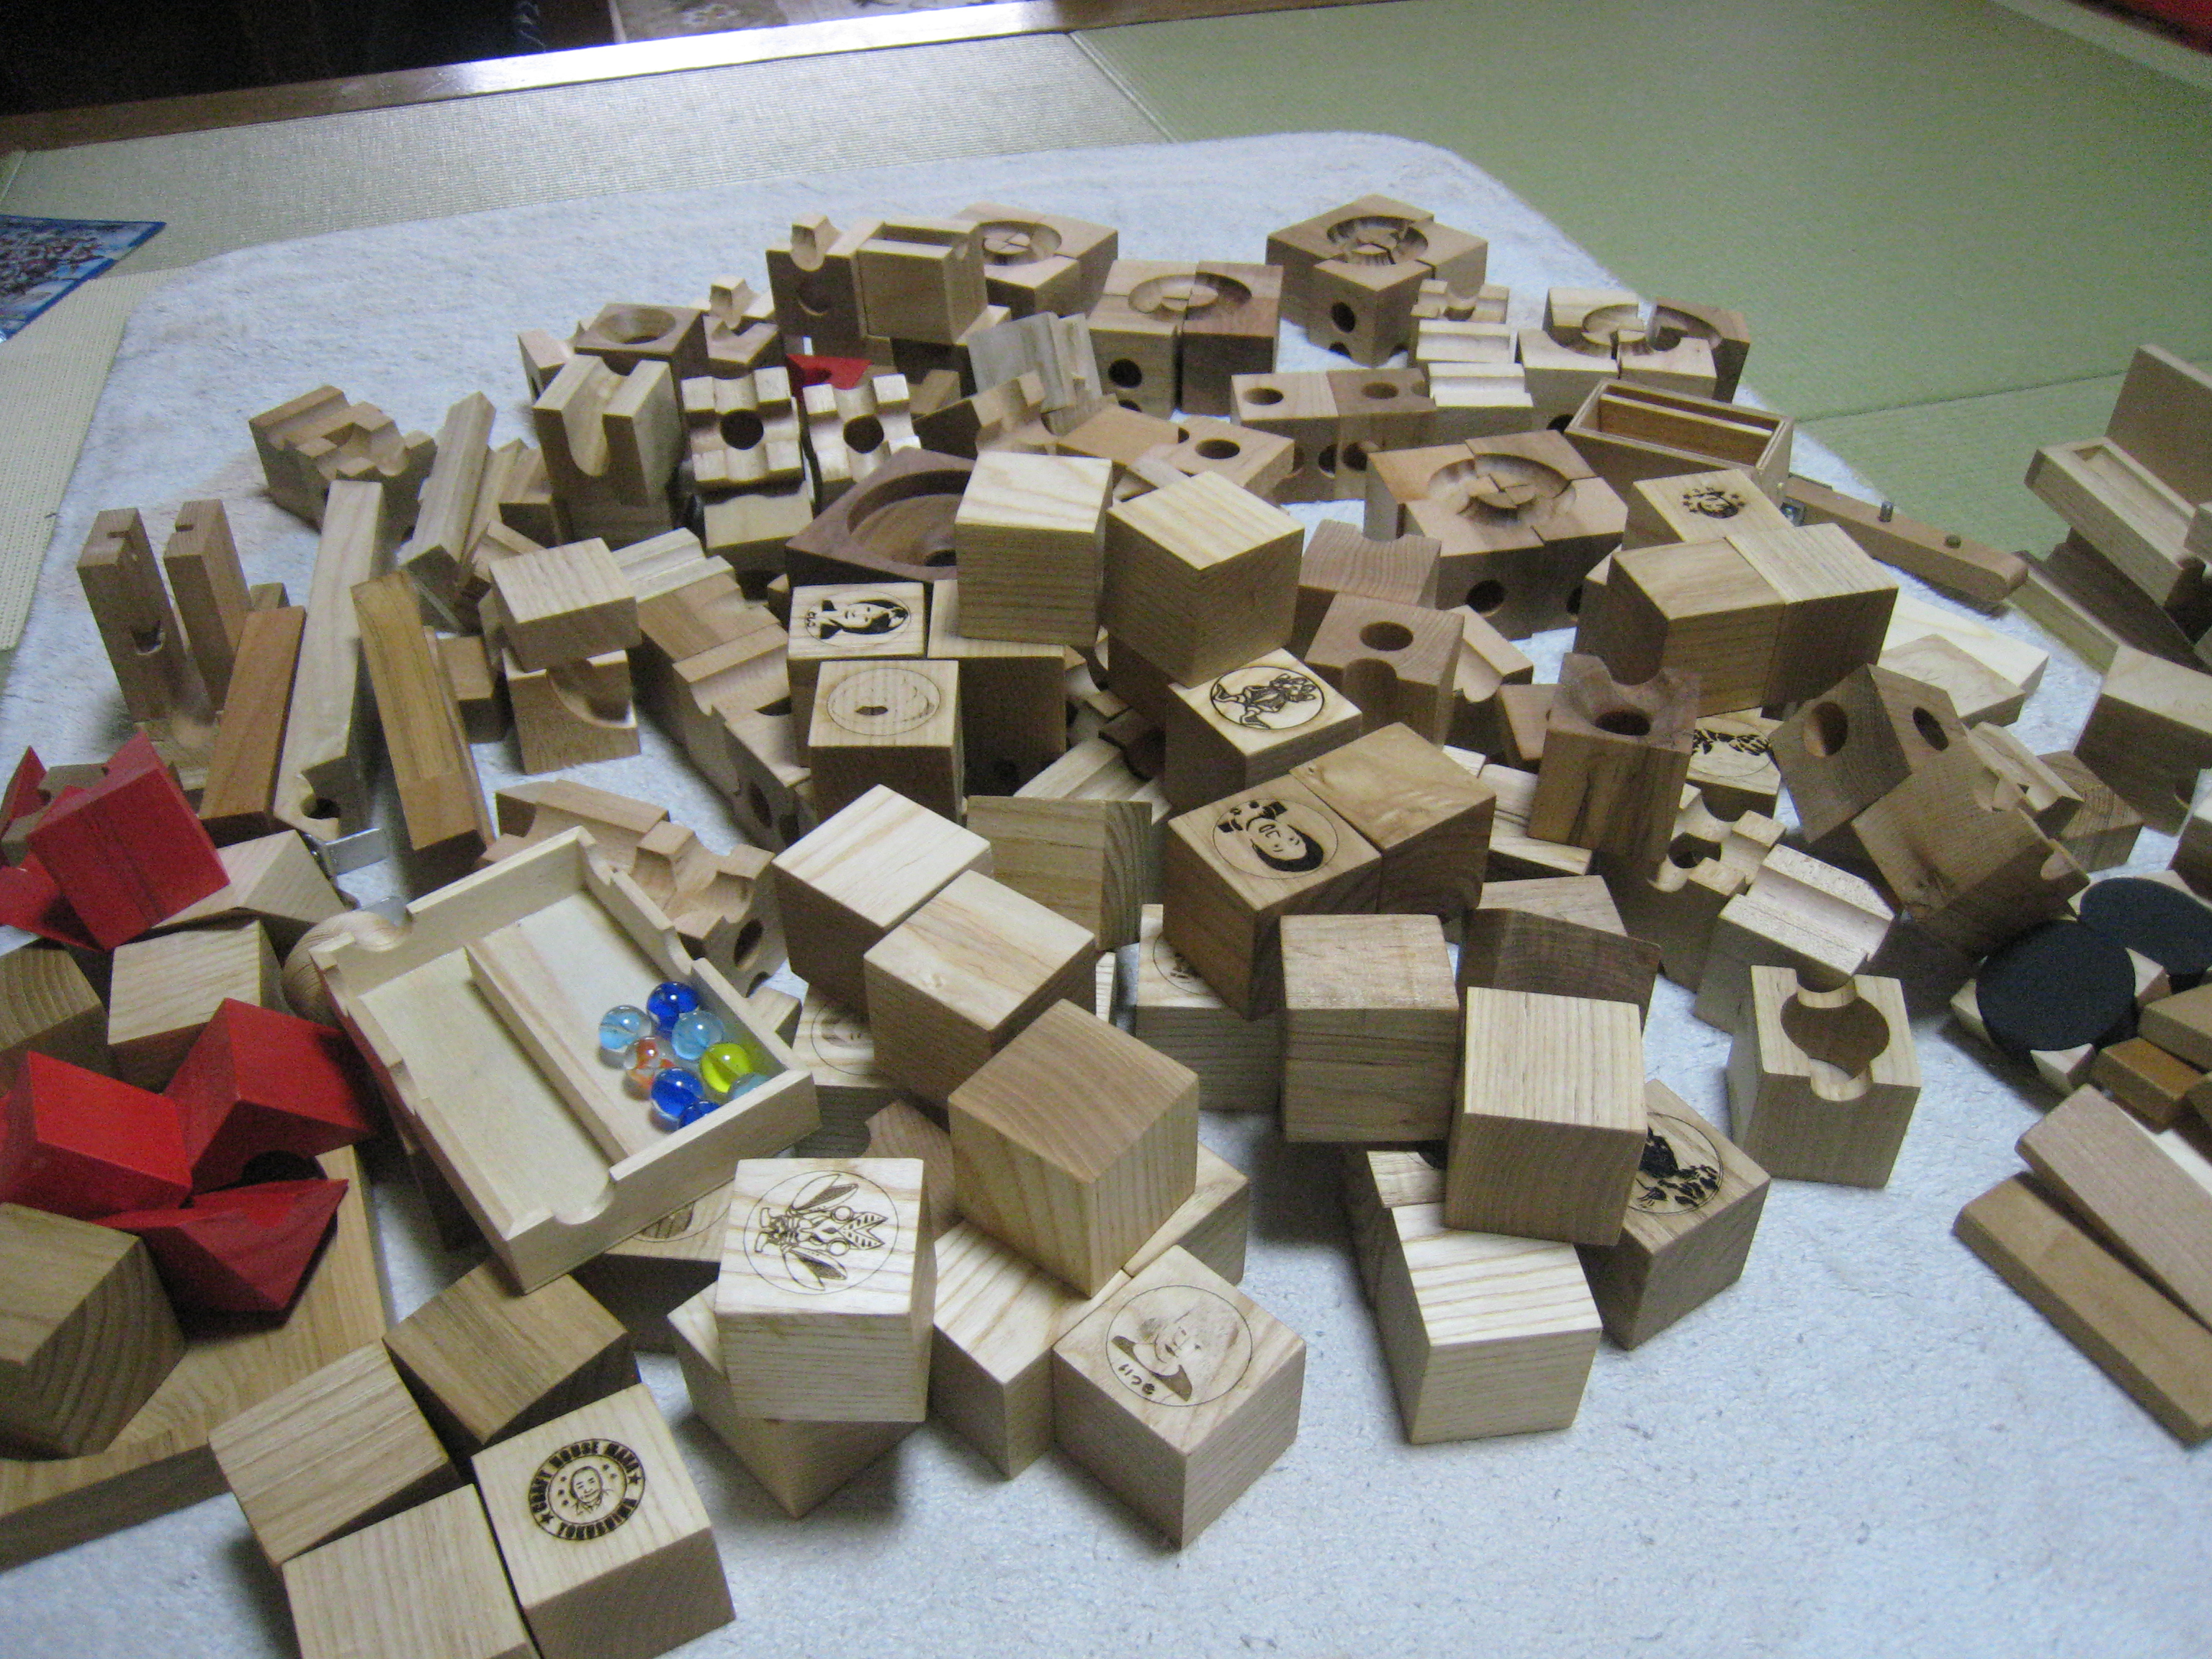
140 squared blocks and other gimmicks. |
||