Lacing pony |
Aug. 18/2019 I made a Lacing pony.When hand-stitching leather, a tool to fix the leather so that both hands can be used is called a racing pony. What I made this time is very general.Drawing |
 |
 |
|
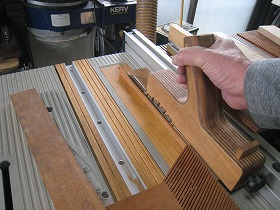
1.The arm part which pinched leather used chestnut wood. First of all, cut along the length. |
2.Next, Cut the width to 50 mm. |
|
 |
 |
|
3.Polish the surface with a drum sander. |
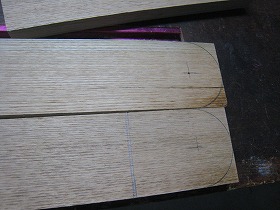
4.Mark the R25 semicircle at the root of the arm. |
|
 |
 |
|
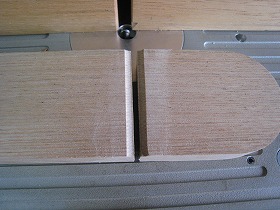
5.Cut the R section with a fret saw. |
6.Finishing of the R section with a disc sander. |
|
 |
 |
|
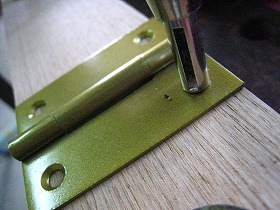
7.As one side of the arm to bent by the hinge, cut at the hinge attachment position. |
8.Since the central part of the hinge is rounded, R3 chamfering process is performed on the plate with a router to escape it. |
|
 |
 |
|
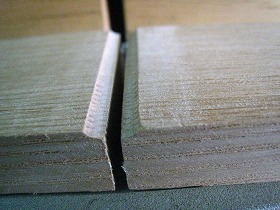
9.Enlarged picture of R part. |
10.This is the part of the jaw that holds the leather attached to the tip of the arm. Carve a groove 50 mm wide x 3 mm deep to insert the arm. |
|
 |
 |
|
11.For 45-degree chamfering process, cut using a self-made miter sled jig. Cut the beveled end of the arm in the same way. |
12.The left and right jaws are complete. |
|
 |
 |
|
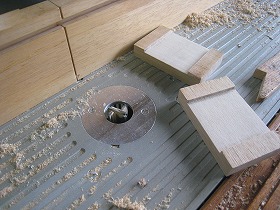
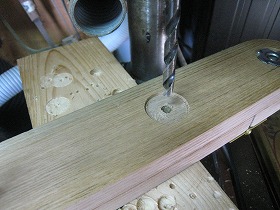
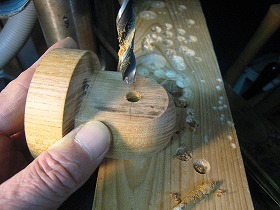
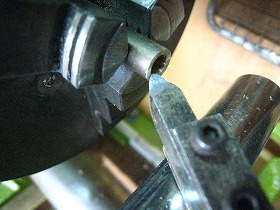
13.Drill in the left arm for the claw nut. First, use a forstner-bit to make a 25 mm dia 2 mm deep, and then drill a 10 mm. |
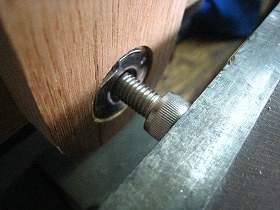
14.Screw a M8 bolt into the T-nut and clamp it with a vise. Yes,The nut can then be mounted horizontally. |
|
 |
 |
|
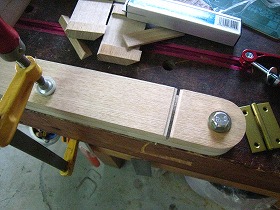
15.Prepare the for hinge installation. Place the right arm on the left arm and clamp it to the workbench with a clamp. |
16.In this condition, use the centering bit for the hinge to drill the pilot hole. In this way, the hinge can be mounted no miss. |
|
 |
 |
|
17.Temporarily attach the hinges and check the movement. |
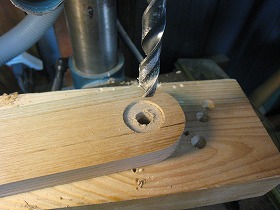
18.Make hole for the lever quick clamp.Clamp the left and right arms with a clamp, first, Drill a 25 mm counterbore for the T-nut on the left arm, then drill 6 mm through on the left and right arms and finally a 10 mm on the left arm. |
|
 |
 |
|
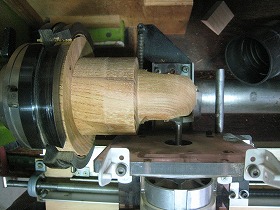
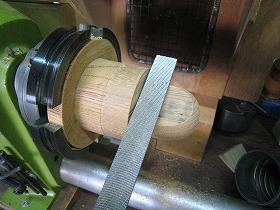
19.This is a pivot part to attach an arm. Make a step with 70mm and 50mm in diameter with chestnut wood, and turning the 50mm part into a spherical tip. |
20.Use a router race to cut both sides of a 50 mm diameter part and finish 35 mm wide. Set the trimmer M6 on the router race and cut two sides with a 28 mm diameter bit. |
|
 |
 |
|
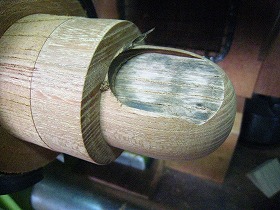
21.Use this index to flip the work 180 degrees. |
22.It was not possible to make the entire surface flat with a 28 mm diameter bit. |
|
 |
 |
|
23.Finish flat with woodworking files. |
24.The two faces are finished flat. After this, cut it to the specified length with the parting tool. |
|
 |
 |
|
25.Drill an 8mm hole for attaching the arm to the cut pivot part. |
26.This is the base part on which the pivot unit rides. Cut a 20 mm thick rubber wood laminate to the specified width. |
|
 |
 |
|
27.A process to sink the head of the M8 hex socket head bolt on the back of the base. After a 12.5mm counter bore with a 20mm phossner bit, drill an 8mm through hole. |
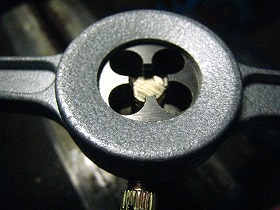
28.The stud bolt connecting the lever quick clamp was made from a brass round bar. First of all, M8 dice . |
|
 |
 |
|
29.Cut to a length of 32 mm. |
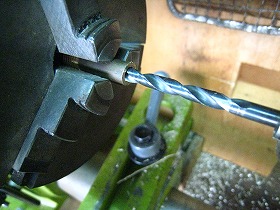
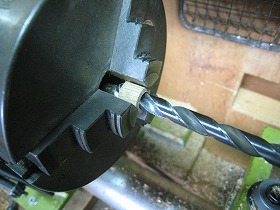
30.Making center hole. |
|
 |
 |
|
31.M6 tap. |
32.Turning the end face. |
|
 |
 |
|
33.M6 tap while chucking on lathe. If the tap while pressing on the tail stock, It can tap to straight. |
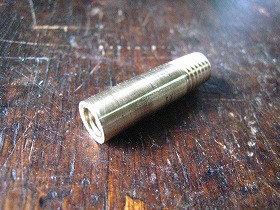
34.Completed stud bolt. |
|
 |
 |
|
35.The right arm through which the axis of the lever quick clamp passes. Modify the 6mm hole to a 10mm slot so that the 6mm axis of the clamp can move. |
36.This is the collar that keeps the coil spring in the center. Outer diameter 12.5 mm. Drill a 6mm hole. |
|
 |
 |
|
37.The collar on the stud bolt side should be expanded to an inner diameter of 8 mm. |
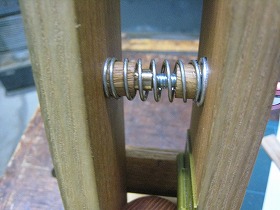
38.Put the collar inside the spring and set the lever clamp. |
|
 |
 |
|
39.Knob portion of lever clamp. The knob can be turned to adjust the gap for gripping the leather, and by pressing down on this lever it can grip firmly. |
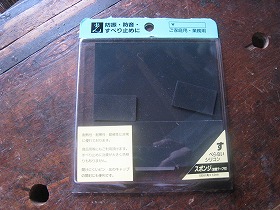
40.Non-slip seat to stick to the jaw part of the arm tip. It is a silicone sheet with a thickness of 1 mm and an adhesive. |
|
 |
 |
|
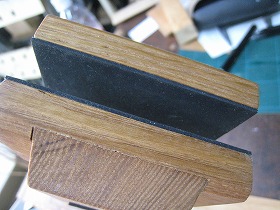
41.Stick to the inner part of the jaws. |
42.Attach a non-slip seat to the back of the base plate so that the pony does not move during work. |
|
 |
 |
|
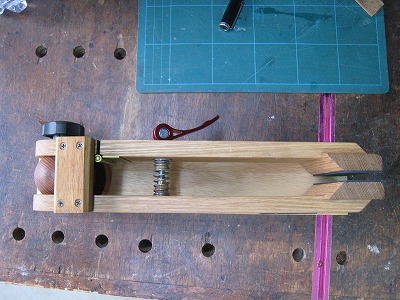
43.View from the folded top. |
44.View from the front. It seems to be able to be stored compactly than I thought. |
|
 |
||
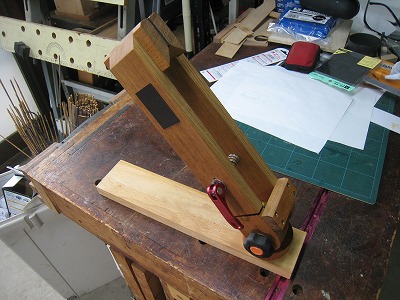
When working, fix the arm at about 60-90 degree. |
||
 |
||
If you work at this angle, the thread will not get caught in the handle of the clamp. |
||