Jig for pentagonal chopstick |
Sep. 29/2021 I received a request from a vocational workshop for the disabled in Nagano Prefecture to make a jig because I want to commercialize pentagonal chopsticks. It seems that Kiso cypress is used, so I made a jig with a slightly thicker tip and sent it.If people with disabilities can master it, it seems that they will need two more.Drawing |
 |
 |
|
1.The jig for marking the pentagon on the square blank material is slightly larger than the one made last time. |
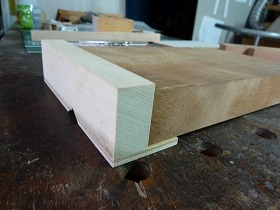
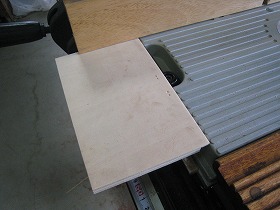
2.A 5.5mm veneer board was attached to make it easier to mark by holding it with one hand. |
|
 |
 |
|
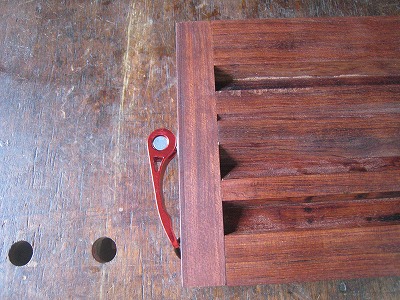
3.This is a jig for tapering, which is used when cutting the 4th groove in the drawing.Drawing |
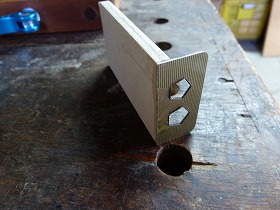
4.A jig that cuts the head of chopsticks at 45 degrees. |
|
 |
||
Jigs that leave for Nagano. I wish you a successful project. |
||
Dec. 8/2019 The pentagonal chopstick is familiar in its hand and has a reputation for being very easy to hold. However, it is very difficult to cut out the correct pentagon. So I made a jig that even a layman could easily make a pentagonal chopstick.Drawing |
 |
 |
|
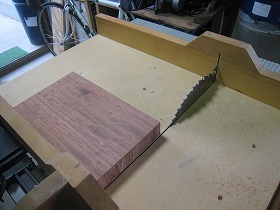
1.The material is Bubinga bought ten years ago. |
2.Since the width is only 100 mm, joint with biscuits. |
|
 |
 |
|
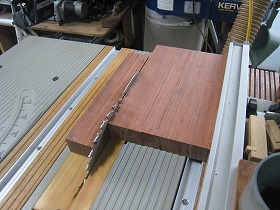
3.Fix the steps with a drum sander. |
4.Cut to a width of 155 mm. |
|
 |
 |
|
5.Cut to a length of 248 mm. |
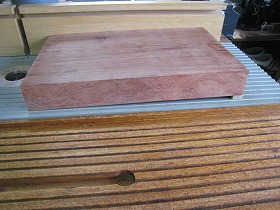
6.Completed the base plate material of 155 W * 248 L * 32 t. |
|
 |
 |
|
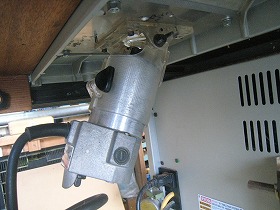
7.This is Makita's trimmer 3702, and It's can adjust the angle of the bit. Attach this to the trimmer base. |
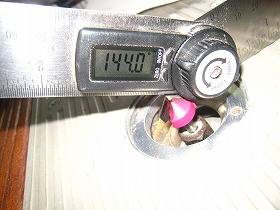
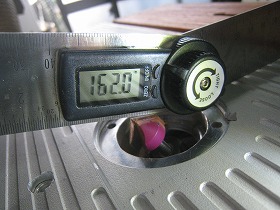
8.Attach a 90-degree bit and adjust the tilt so that the table surface and the bit surface are 144 degrees. In such a case, a digital protractor is convenient. |
|
 |
 |
|
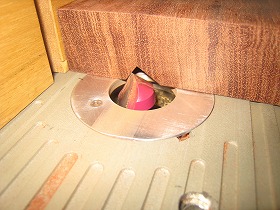
9.Cut the No.1 groove in the drawing. |
10.Next, cut the groove No.3 in the drawing. First cut a 90 degree groove with a bit that was tilted 144 degrees. |
|
 |
 |
|
11.Next, Turn over the work and cut the opposite side to complete the groove of 108 degrees. |
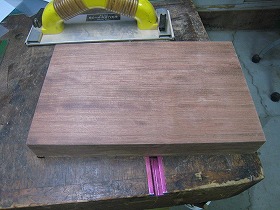
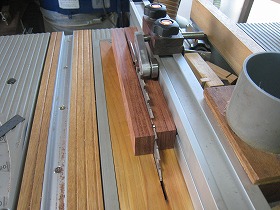
12.Cut groove No.4 in the drawing. Apply a 5.5 mm thick wood plate to the end of the workpiece with double-sided tape because it is a tapered groove. |
|
 |
 |
|
13.The workpiece is diagonally. |
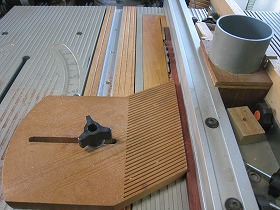
14.There was a problem here. The left side of the trimmer table is so narrow that the work piece comes off the table. This does not cut the correct taper. So I made an extension table with a veneer board. |
|
 |
 |
|
15.The procedure is the same as in step groove No.3, but the groove depth of the part where the plate is attached is 1.5 mm. |
16.The portion of the tapered groove seen from the cut side surface. |
|
 |
 |
|
17.The groove depth of the part where the board is not attached is 7 mm. |
18.Finally, cut groove No.2 in the drawing. Set the bit plane to 162 degrees. |
|
 |
 |
|
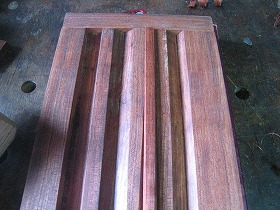
19.Groove No.2 completed. |
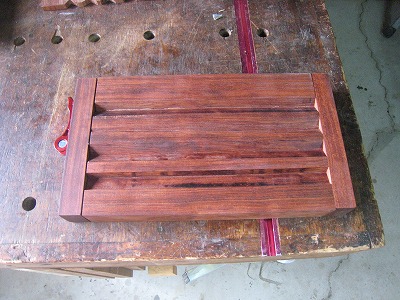
20.This completes four grooves. |
|
 |
 |
|
21.From now on, make the holding plates at both ends. First of all, split. |
22.Cut to a length of 155 mm. |
|
 |
 |
|
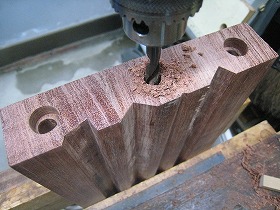
23.Fixed side holding plate. Counterbore a 15mm for sunk the head of the bolt. |
24.Next drilling a 7mm. |
|
 |
 |
|
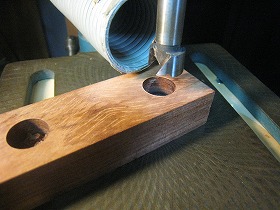
25.This is the moving side pressure plate. Counterbore 15 mm, and Drilling 10 mm for guide pins. |
26.The side to attach the fixed side holding plate of the main body. Drill a 9 mm pilot hole at only one place. And Tap in the insert nut M6 ~ 13 L . Put a bolt and tap it so that the screw is not damaged. |
|
 |
 |
|
27. Fix the pressure plate in one place with screw. And, drill the remaining 2 holes with a 7mm drill. |
28.Expand the of 7 mm to 9 mm so that the insert nut can be inserted. |
|
 |
 |
|
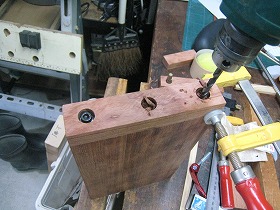
29.Counterbore 15 mm x 6.5 deep for spring insert, into the main body to which the moving pressure plate is attached. |
30.Fix the pressure plate with a clamp, first Drilling a 10 mm on the left side, and Drilling a right hole with the pin inserted on the left side. |
|
 |
 |
|
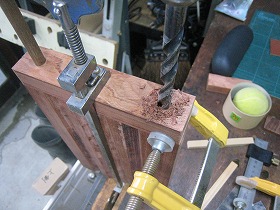
31.Drilling a 9mm in the center for M6 insert nut. |
32.Oil finish each part. This assembly a holding plate to the fixed side. |
|
 |
 |
|
33.Glue a 10 mm diameter guide pin to the moving side pressure plate. The guide pins are teak wood. |
34.After inserting the guide pin, the front side of the pressure plate was finished with sandpaper. |
|
 |
 |
|
35.Insert a compression coil spring into the 15 mm counterbore. |
36.Assembly part of guide pin and coil spring. |
|
 |
 |
|
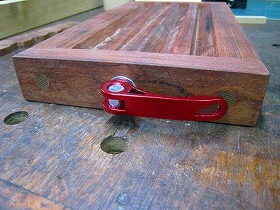
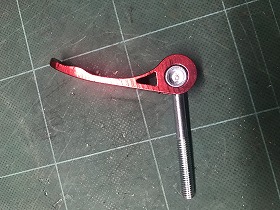
37.Screw in the lever clamp. Assembling of the moving side pressure plate is complete. |
38.This lever clamp is a bicycle part. |
|
 |
||
39.I think that It's moderately heavy and easy to use. |
||
 |
||
40.The presser plate moves when the clamp is moved left and right. And It can fix the workpiece firmly. (Please put your mouse on the photo) |
||
 |
 |
|
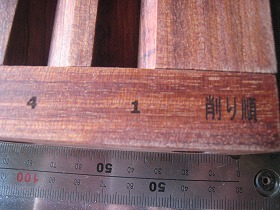
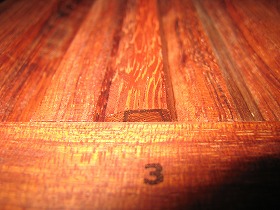
41.Mark the order of planeing with a laser. |
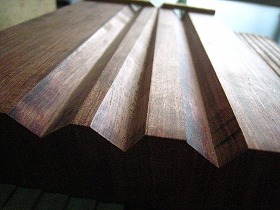
42.Put the workpieces in the grooves in order from No.1, and planer.It's become a hexagon. |
|
 |
 |
|
43.Template of pentagon mark to work-piece end. I happened to have an old Mombell membership card in the wood work shop, so I was able to cut it surprisingly beautiful when I cut it with a laser. |
44.Pentagonal holes with a diagonal length of about 8 mm, and about 9 mm. I cut the member number part and completed the template. |
|
 |
 |
|
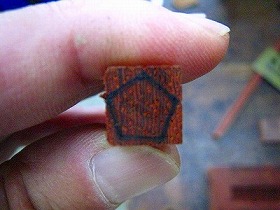
45.The material is 10 mm square. Cut out the square of the rosewood. |
46.Mark a pentagon on the end face of the work pices with a template. |
|
 |
 |
|
47.I was able to mark the pentagon correctly. |
48.Put the bottom of the left picture on the lower left in the first groove.and Planing it. |
|
 |
 |
|
49.In the No.2 groove, put the side that in No.1 cut side on the right. |
50.In the No.3 groove, put the side of angle 108 degrees on the under. And planing to will become a hexagonal rod. |
|
 |
 |
|
51.Finally, in order to finish in a tapered shape, it is put in the No.4 groove and planeing each side. |
52.Scraping little by little. |
|
 |
 |
|
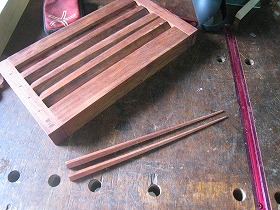
53.It has become a pentagonal chopstick. |
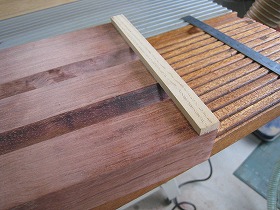
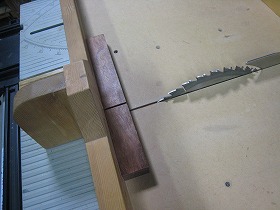
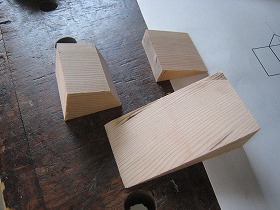
54.Next, make a jig to cut the head to 45 degrees.Cut out the parts with a slide saw. Drawing Jig-2 |
|
 |
 |
|
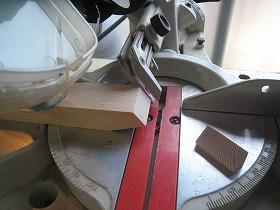
55.There are 3 parts. Bond these together. |
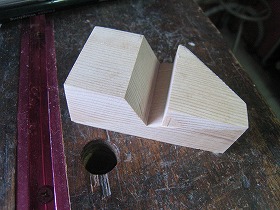
56.Once bonded, mark the 45 degree cut line. And cut with a slide saw. |
|
 |
 |
|
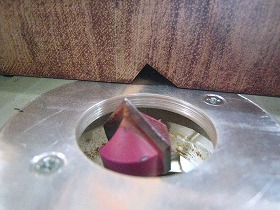
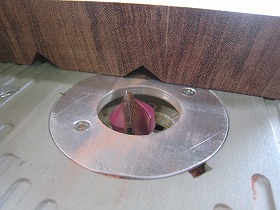
57.It is the completion of the pentagonal pyramid jig. |
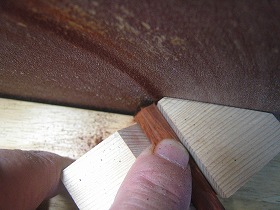
58.Align the 45 cut surface of the jig with the disc sander. And if it sanding each side of a pentagon, it will become a pentagon pyramid. |
|
 |
||
The vertex is at the center. It is a beautiful chopstick head. |
||
 |
||
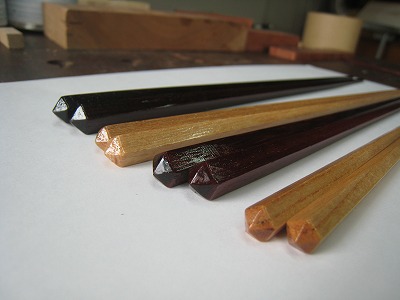
Used "kigatame ace" for finishing. |
||
 |
||
I think it is a good job as the first time chopstick making. Let's challenge making chopstick with various materials! |
||