Yusanbako |
Aug. 14/2021 Yusanbako is Traditional Lunch Boxes in Tokushima JAPAN.Nowadays, colorful Yusanbako are on sale. I made a simple one that makes the best use of the grain of wood. The material is cedar, and the size is such that it can be made with two 250 * 900 * 10t pieces.Drawing |
 |
 |
|
1.I decided to make the outer box with finger joint. However, I didn't have a template with a groove width of 10 mm, so I made it from plywood. First attach the plywood to the jig and cut a groove with a 10mm bit. Next, insert two 10 mm keying materials between the jig and cut a groove. Go to finger joint jig |
2.A groove with a pitch of 20 mm. |
|
 |
 |
|
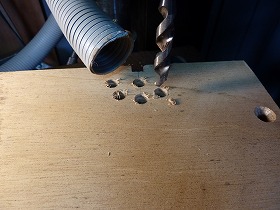
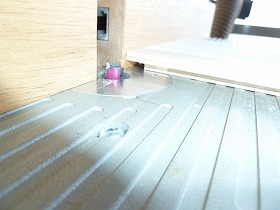
3.Drilling for air intake. |
4.Glue a 10mm wide positioning bar. |
|
 |
 |
|
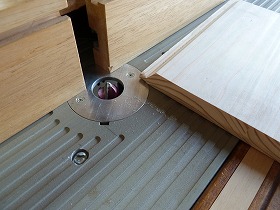
5.The lower two templates are 8mm and 15mm wide, which were made with MDF. |
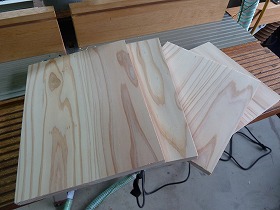
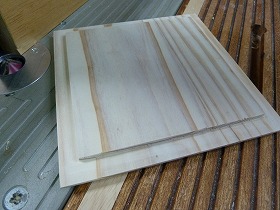
6.Cut 10mm thick cedar wood to the size of the outer box. |
|
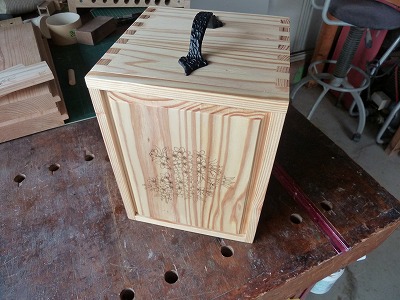
 |
 |
|
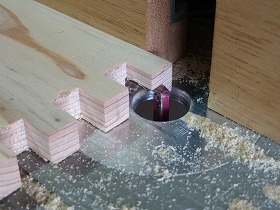
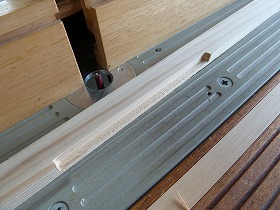
7.Making finger joint. If you cut a groove with a depth of 10 mm in one shot, the board seems to burn, so it took longer than I expected because I cut it in two steps. |
8.The front side of the top plate. Cut a 6mm wide groove for the sliding door. |
|
 |
 |
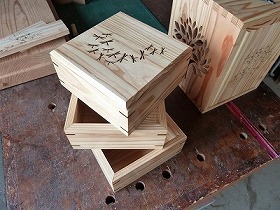
|
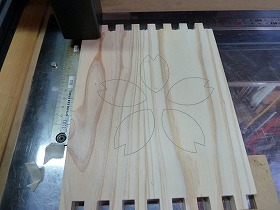
9.The left and right of the plate will put the cut-out pattern. Laser engrave a large tree mark on the left side. |
10.Engrave the cherry blossom petals on the right. |
|
 |
 |
|
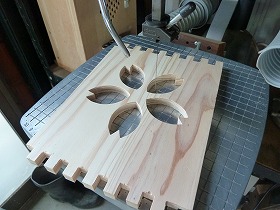
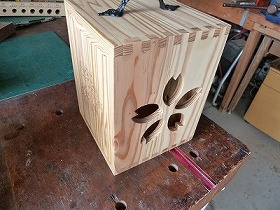
11.Cutting out the cherry blossoms was quick and easy. |
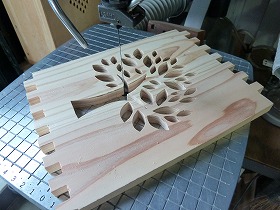
12.The large tree has 39 cutouts, which was a tiring task. |
|
 |
 |
|
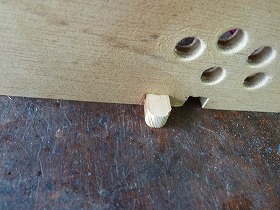
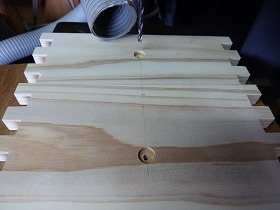
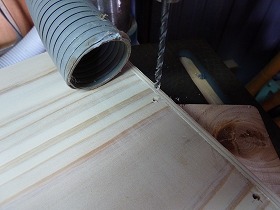
13.Counterbore 9mm for M3 nuts to attach handles to the top plate. |
14.Drilling 3mm through hole. |
|
 |
 |
|
15.Cut the thickness of the part that goes into the groove of the slide door and the upper part to 6 mm. |
16.Cut the periphery with a 90 degree bit to an inclination of 45 degrees. |
|
 |
 |
|
17.This is a pull-up bar attached to the top of the sliding door. First cut a 6mm deep groove. |
18.Then cut to 10mm width. |
|
 |
 |
|
19.After gluing the pull-up bar to the door, insert a 3mm bamboo skewer just in case. |
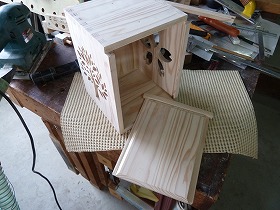
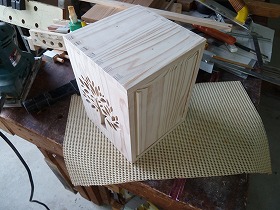
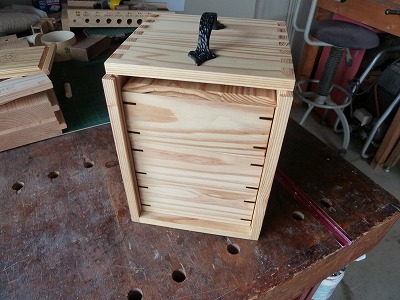
20.This completes the outer box !!. It have to do is apply Watco oil. |
|
 |
 |
|
21.The sliding door moves smoothly. |
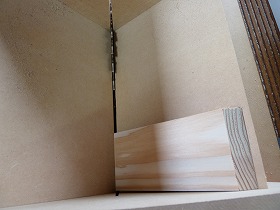
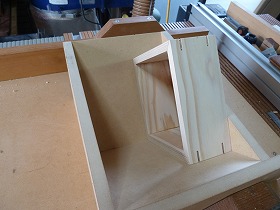
22.From here, it's the process of making the nest of boxes. First, cut the end face to 45 degrees with a miter jig. |
|
 |
 |
|
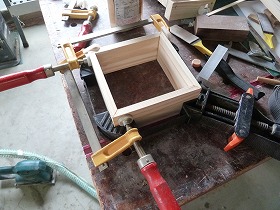
23.Glue with a yellow bond while checking the right angle. |
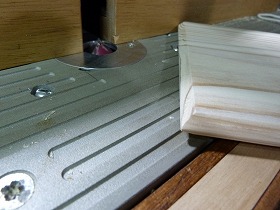
24.Grooving for the spline slot. |
|
 |
 |
|
25.Used rosewood for the spline slot. |
26.This is the lid of the nest of boxes. Cut the four sides of the lid to 45 degrees. |
|
 |
 |
|
27.Make a 3mm step on the back of the lid. |
28.This completes the nest of boxes. Wonder if the plate thickness 10mm is a little too thick. |
|
 |
 |
|
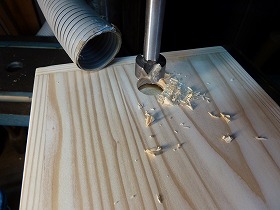
29.I noticed that I forgot to make a hole in the back of the outer box to push out the nest of boxes. Drilling with a Forstner bit 20 mm. |
30.Engraved the picture of a cherry to the sliding door with a laser. |
|
 |
 |
|
31.Engraved my brand mark on the back side. |
32.It was also engraved on the lid of the nest of boxes. |
|
 |
 |
|
33.Finish the outer box with clear Watco oil, and the nest of boxes with water resistant "Kigatame ace" three times and then finish with it clear. |
34.Engraved cherry blossoms on the sliding door. I wonder if it should have been a little darker. |
|
 |
 |
|
35.This is the cutout part of the cherry blossom petals. |
36.This is the cutout of the large tree. |
|
 |
||
The storage state of the nest of boxes. |
||
 |
||
I think it's simple and nice. |
||