Window shade for Vandwelling |
May. 15/2022 I became more motivated to try Vandwelling, so I made a window shade that does not leak light at night.It's for the Subaru Forester.I have a genuine sunshade of SUBARU Forester for windshield, so this time I made 9 for other windows. |
 |
 |
|
1.I thought that condensation would form inside the car when the windows were closed, so I chose a aluminum foil insulated foam mat that also has heat insulating properties.I bought two 120 * 180 cm thickness 13 mm folding foam mats at a home improvement store. |
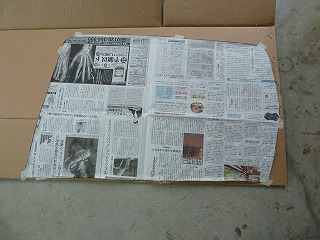
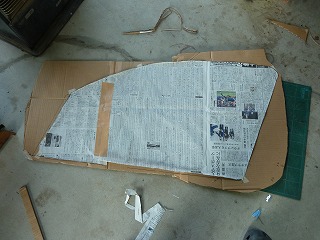
2.At first, make a window on the right side of the rear seat. Place the newspaper that was pressed from the inside of the window and shaped with a marker on the corrugated cardboard, and mark the periphery with a marker. |
|
 |
 |
|
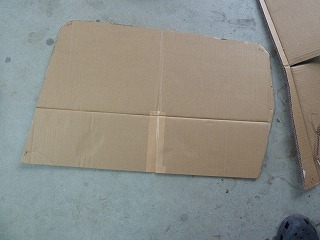
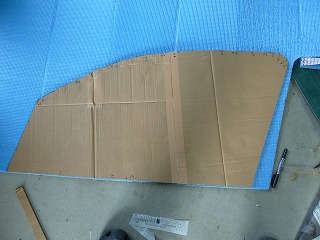
3.It is important to use this cardboard. After cutting the cardboard, actually insert it from the inside of the window and correct the R part and length so that it fits perfectly. This process took the longest time, but if you do it well, you will get a beautiful window shade. |
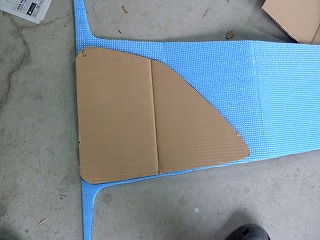
4.Place a cardboard pattern on the blue side of the foam mat and mark the surrounding area with a marker. |
|
 |
 |
|
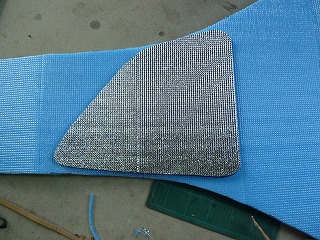
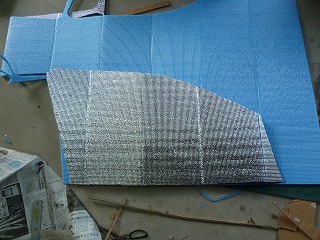
5.Cut it with a box cutter instead of scissors, the cross section will be clean. |
6.The shade on the left side of the rear seat used the cut out foam mat as a mold. Turn the cut foam mat over and place it on a new foam mat to mark the surrounding area. |
|
 |
 |
|
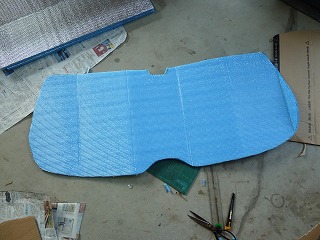
7.If this is separated, it will be the shade on the left side of the rear seats. |
8.Next, make a sunshade for the right rear side glass. Marking using a cardboard pattern, just like for the rear seats. |
|
 |
 |
|
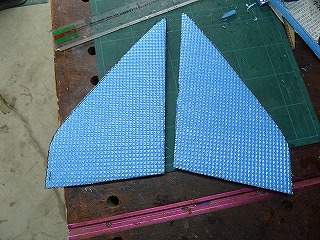
9.Turn the cut right sunshade over and place it on the foam mat for marking. This is for the left window. |
10.The window for the driver's seat is large, so newspapers are connected with packing tape. It was hard work alone, but I managed to copy it. |
|
 |
 |
|
11.It was difficult to make a cardboard mold, and I made adjustments by going back and forth between the workshop and the car over and over again, but I couldn't make the one that fits perfectly. The part with a gap with the window was marked on the cardboard with the gap of how many mm, and it was marked while adjusting when copying it on a silver mat. |
12.Actually install the sunshade for the driver's seat that I cut out, and fine-tuned it to make something without gaps. Turn it over and place it on the foam mat to mark the passenger sun shade. |
|
 |
 |
|
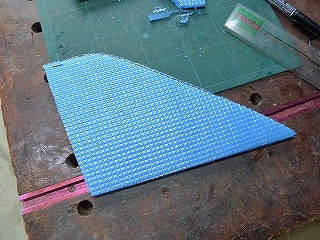
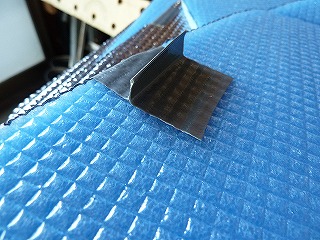
13.The last is for the rear hatch glass. The cardboard wasn't big enough, so I made a half-glass mold. The entire width of the glass is measured in advance, and the mold is inverted to match it, and the entire marking is done. Also, the lower notch is where the rear camera cover fits. Make another mold for this part and mark it so that it fits tightly. |
14.The finished sunshade for the rear hatch. |
|
 |
 |
|
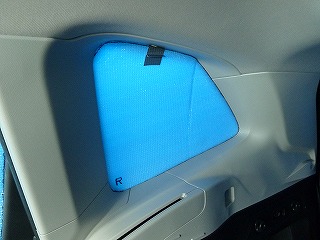
15.For the triangular window on the driver's side. Because it is small, it was easy to mold. |
16.Cut with a box cutter. |
|
 |
 |
|
17.Completed for the passenger seat side. |
18.A strong adhesive tape knob is attached so that the shade can be easily removed. |
|
 |
 |
|
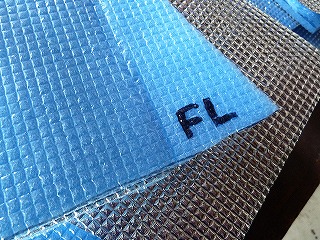
19.Mark with a marker so that you do not get lost when installing. Since this is FL, It can see that it is the passenger seat window on the Left side of the Front desk. |
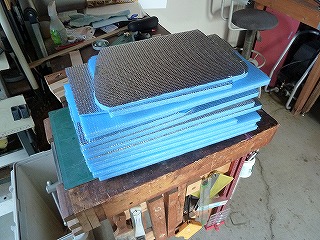
20.When the completed 9 sets are stacked, the height is about 230 mm. |
|
 |
||
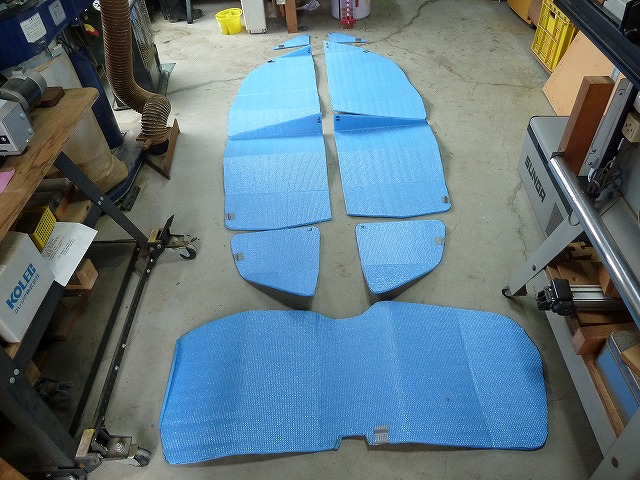
I tried to spread 9 sheets. |
||
 |
 |
|
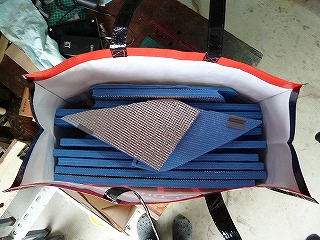
22.Put it in a tote bag bought for 1$ shop. The size is 400 vertical x 480 horizontal x 200 mm wide. |
23.If the width is 230mm, it fits perfectly, but if put the sunshade for the rear side glass in the center edge, it will fit without problems. |
|
 |
 |
|
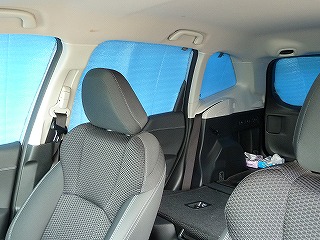
24.Let's see the actual installation. This is the rear hatch part, which is firmly attached without using a suction cup. |
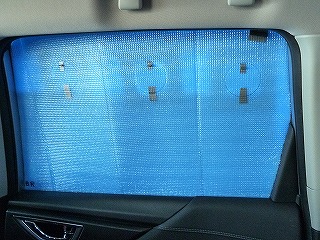
25.The left part of the rear side glass. |
|
 |
 |
|
26.The left window of the rear seat. |
27.Driver's seat window. |
|
 |
 |
|
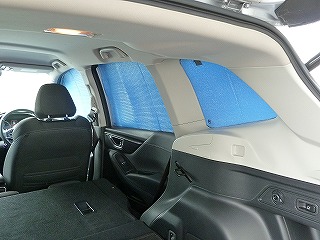
28.Driver's side and behind it. |
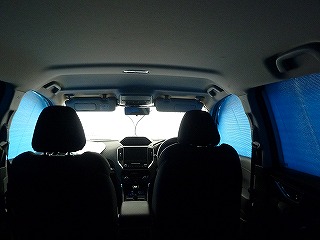
29.View of the rear seats and rear hatch from the driver's seat. |
|
 |
 |
|
30.View from the rear hatch. |
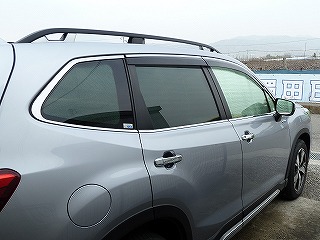
31.The inside is completely invisible from the outside. |
|
 |
 |
|
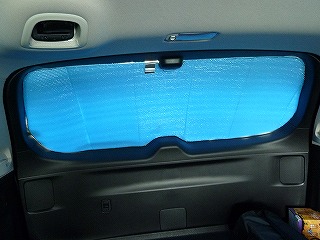
32.SUBARU genuine front sunshade. You can't see the inside from the outside. |
33.However, there is a lot of light inside. |
|
 |
 |
|
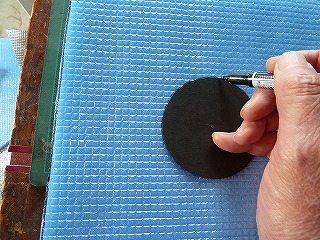
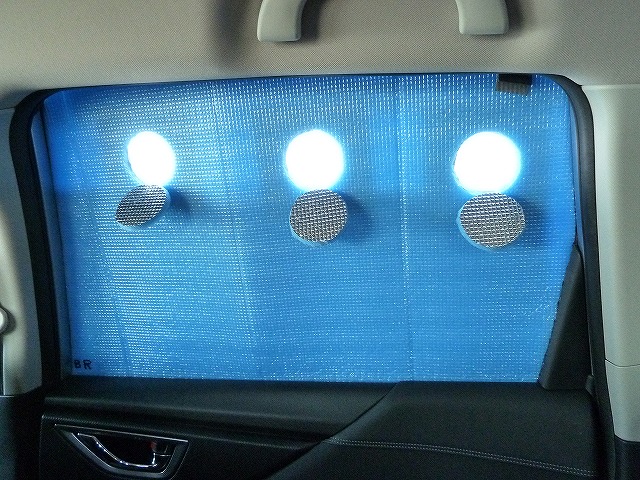
34.Considering the summer, I decided to open a window to let in the outside air. Cut thick paper to a diameter of 80 mm, use it as a template, and mark it on a foam mat. |
35.Mark it like this. Attach three windows to each of the left and right wind shields on the back seat. |
|
 |
 |
|
36.Cut along the mark with a box cutter. |
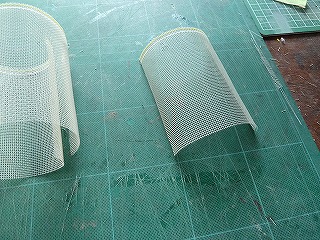
37.Cut the screen for replacing the screen door into 100 mm squares. |
|
 |
 |
|
38.Stick the net from the front side with a strong adhesive tape. |
39.Attach the underside of the cut disk to the main body with strong adhesive tape to make a hinge. A knob for opening the window is attached to the top. |
|
 |
||
Lower the rear seat window and use a screen door. |
||
 |
||
When it open the three windows, it looks like this, and a decent breeze comes in. |
||