Samsonite 2 wheel suitcase wheel replacement |
Mar.24/2024 The wheels of the Samsonite carry bag (Essensis Pro Rolling Tote) I purchased in 2019 have started to make a rattling noise. The main body was still in good condition, so I bought similar wheels online and replaced them.Drawing |
 |
 |
|
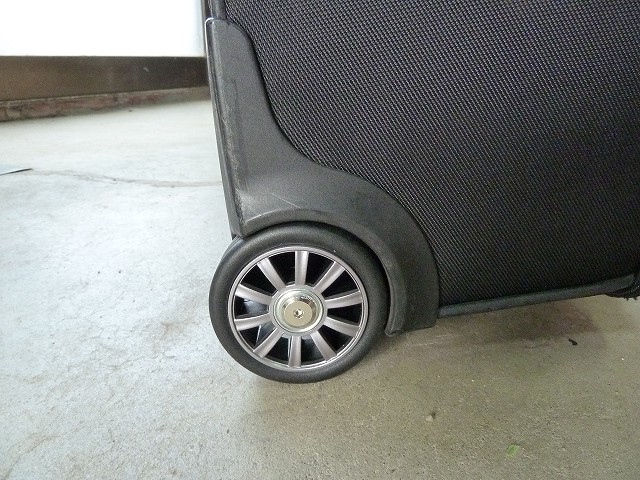
1.This is the Samsonite Essensis Pro Rolling Tote. I purchased it in April 2019 and use it for business trips about 120 days a year, so I've traveled around the country with it for nearly 600 days. |
2.The main body is still in good condition and seems usable, but the wheels are starting to rattle and make unpleasant noises, so I decided to replace just the wheels. |
|
 |
 |
|
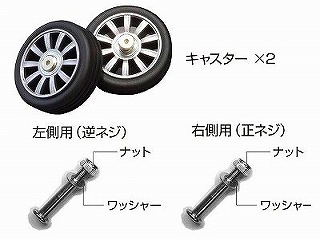
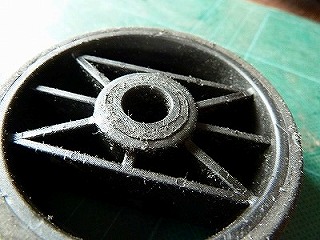
3.This is a replacement wheel from a certain manufacturer that I purchased on Rakuten. Although the outside diameter is a little large at 80mm, I thought I could somehow install it, so I took the plunge and purchased it. |
4.The box I received contained two wheels, two shafts, and U-nuts and washers. One side has a left-hand thread to prevent it from loosening when the wheel rotates. It also appears that the wheels are equipped with thin ball rings. |
|
 |
 |
|
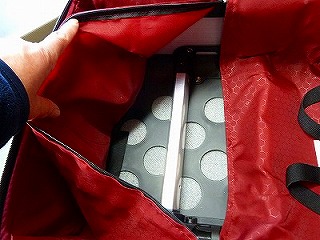
5.First, open the maintenance zipper on the inside of the bag so you can see the wheel mount. |
6.Remove the three screws that secure the inner plastic cover. |
|
 |
 |
|
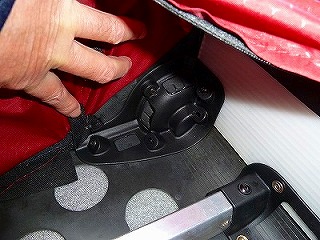
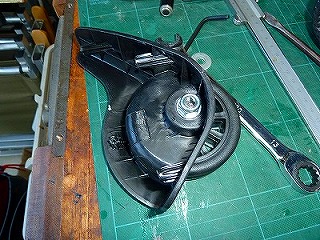
7.This is the inner plastic cover that was removed. |
8.The plastic cover that the wheels are attached to has been removed. It will come off easily if you twist it a little and pull it out. |
|
 |
 |
|
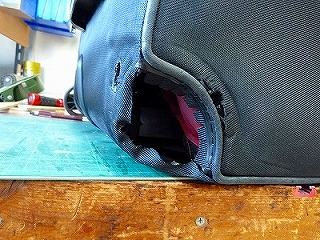
9.There are holes like this in the main body, so if you go into a deep puddle on a rainy day, it will flood. |
10.The tip of the wheel shaft is visible inside the cover. |
|
 |
 |
|
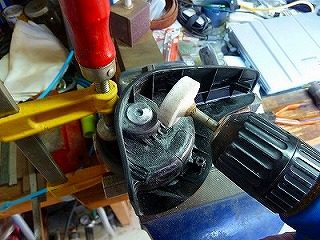
11.Judging from this structure, it looks like the tip of the 8mm shaft is counterbore and caulked, so if you sand this down with a sander, the shaft will likely come out. |
12.The disc sander is too big to fit, so attach a whetstone to the drill and scrape off the caulked part. |
|
 |
 |
|
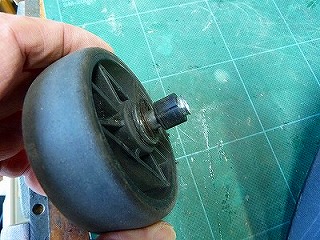
13.Sand until you can see the 8mm shaft. It was able to easily remove it by tapping the shaft part. |
14.Disassembled wheel part and outer plastic cover. |
|
 |
 |
|
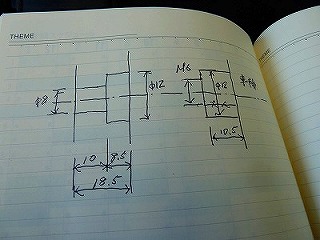
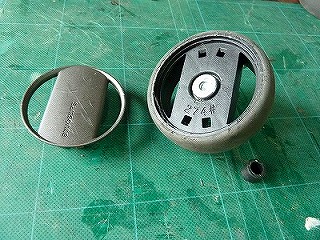
15.The wheel shaft is 8mm and has a collar with an outer diameter of 12mm. |
16.The part of the plastic cover that used to contain the collar has a 12mm counterbore. |
|
 |
 |
|
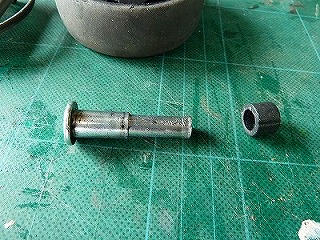
17.The counterbore part is 12mm in diameter x 8.5mm in depth. The protruding part of the wheel shaft collar is 12mm in diameter and 11mm in length. It's a perfect fit. |
18.When I installed the wheel, the shaft seemed to be a little short, but I managed to reach the U-nut. I don't think the U-nut will loosen, but just to be sure, I'll put a little bit of superglue on it. |
|
 |
 |
|
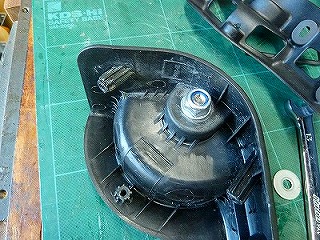
19.Check that the U-nut on the wheel shaft does not interfere with the inner cover. It seems like it can be assembled without any problems since there is very little interference. |
20.Attach the outer cover, then attach the inner plastic cover with three screws to complete the replacement. |
|
 |
 |
|
21.Follow the same procedure to replace the wheel on the other side. However, since the wheels on this side rotate to the left, a left-handed threaded shaft is used. |
22.Full surface of the wheel. If I ever need to replace the wheels again, I think I can do it by removing only the inner cover without removing this outer cover. |
|
 |
||
The wheels fit like genuine products and I don't feel any discomfort at all. |
||
 |
||
The wheel diameter is about 5mm larger than the genuine product, but it moves smoothly without hitting the cover. |
||
| Extra version | ||
 |
 |
|
1.Being a mechanical designer, I decided to see what kind of structure the old wheels had. |
2.Remove the cover with the logo on the outside of the wheel, and the shaft will come out. |
|
 |
 |
|
3.The wheel part is 3/8 inch with a stepped shaft, and the part that inserts into the outer cover is 8 mm. |
4.There are no bearings in the wheels, and they appear to have wear-resistant collars. In any case, this part seems to have worn out and become rattling. |
|