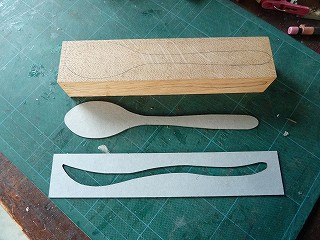
Handmade spoon |
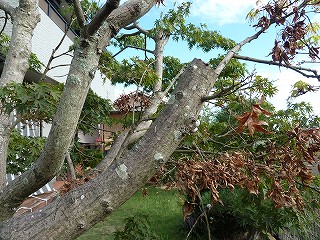
Mar.4/2025 The maple tree in the garden has been growing for 26 years and has become too big. I cut off a thick branch and decided to use it to make a commemorative spoon. I also used the ash wood that I had been sawing for spoons for many years.Drawing |
 |
 |
|
1.Maple tree in the garden. This branch is the first material. |
2.Cut the round branches into squares using a band saw. |
|
 |
 |
|
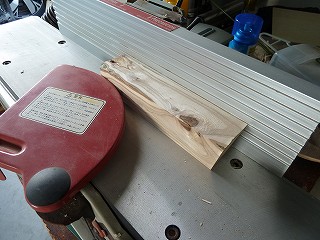
3.Shaped into a square shape using an automatic plane. |
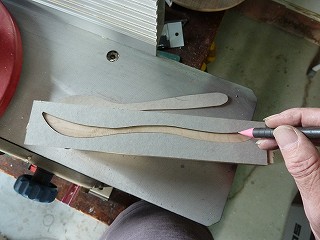
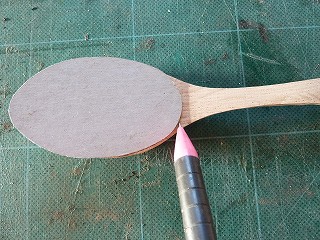
4.First, mark the shape of the side using a spoon pattern cut out with a laser. |
|
 |
 |
|
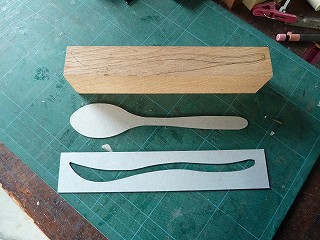
5.This is how the marking was completed. By the way, the material used is not maple leaves but Japanese ash. |
6.In the same way, use the template to mark the top of the spoon. |
|
 |
 |
|
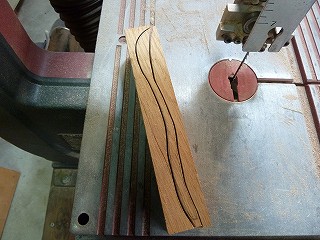
7.Cut the sides along the markings with a band saw. The blade width is 3mm. Make sure to start cutting from the side. |
8.Glue the three cut parts together with a little glue. This will make the next cutting process easier. |
|
 |
 |
|
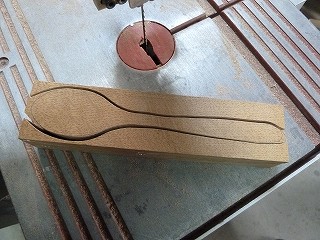
9.Cut the top side using a bandsaw. |
10.When you do this, the center part will become a spoon shape like this. This is the side. |
|
 |
 |
|
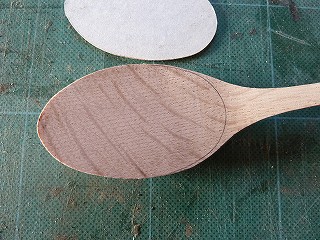
11.So, this is the top side. |
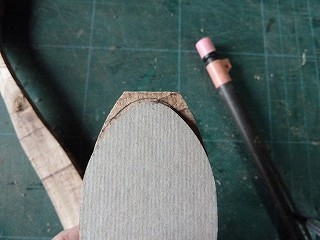
12.Mark the tip of the spoon with the template. |
|
 |
 |
|
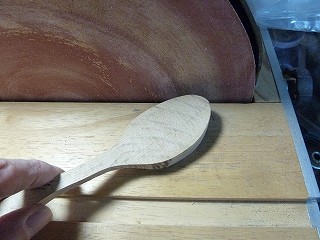
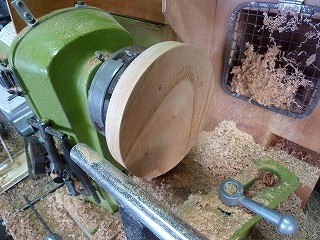
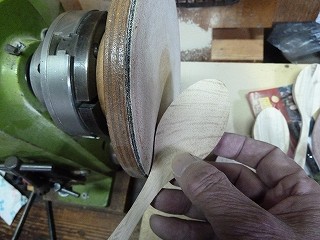
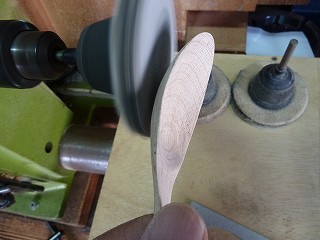
13.Use a disc sander to round the tip. |
14.It is difficult to shape the entire spoon with a 300mm disk sander. Then, I realized that I had some 125mm sanding cloths that I had received when I bought a router bit at "Digram" before. |
|
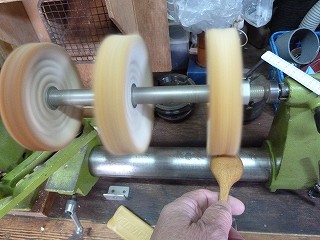
 |
 |
|
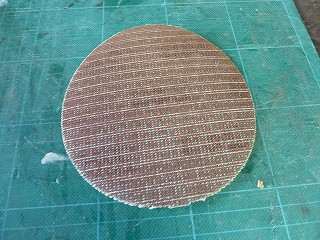
15.The grit size is #240 and it seems to use ceramic abrasive grains, so it seems just right for shaping spoons. |
16.So I quickly decided to make a 125mm sanding plate that could be attached to a woodworking lathe. |
|
 |
 |
|
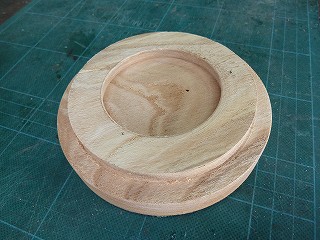
17.The back of the plate has grooves to allow the Bantam Chuck to expand and grip. |
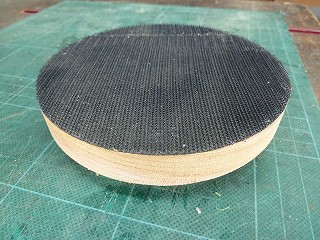
18.Use G17 glue to attach Velcro to the front of the plate. |
|
 |
 |
|
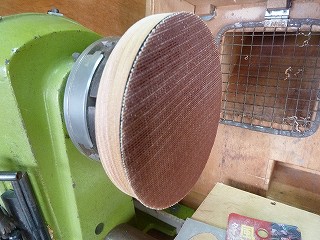
19.Apply 125mm sanding cloth and it's ready to go. |
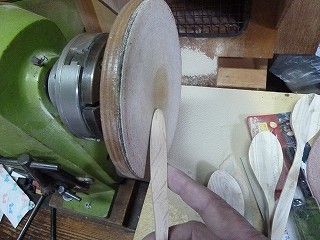
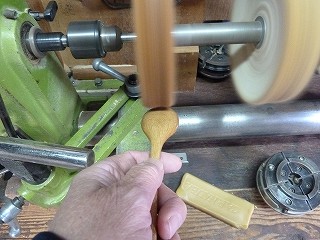
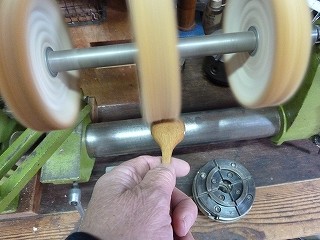
20.Shaping the head of the spoon |
|
 |
 |
|
21.Next, shape the grip part. |
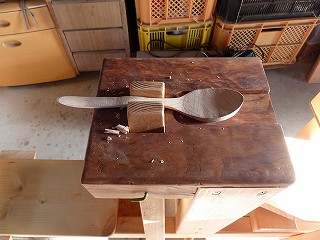
22.It has become spoon-shaped. |
|
 |
 |
|
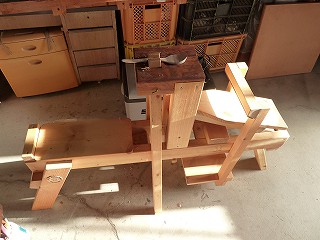
23.The next step was to make the pressure points, and here I pulled out the shaving hose that I had made a long time ago and had been sleeping in a corner of the warehouse. This is what it looks like with the Spoon Mule set in it. |
24.Mark the part to be dug using the pattern. |
|
 |
 |
|
25.Dig along this line. |
26.Grasp the ingredients with a spoon mule. |
|
 |
 |
|
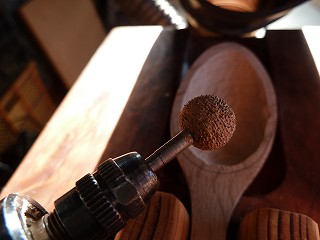
27.A tungsten ball was used for rough cutting. |
28.It can be easily shaved off. |
|
 |
 |
|
29.The general shape was completed using a tungsten ball. |
30.When I tried to do the finishing carving with a carving knife, I realized that it would be inconvenient if there was no support for the point on the other side of the Spoon Mule. |
|
 |
 |
|
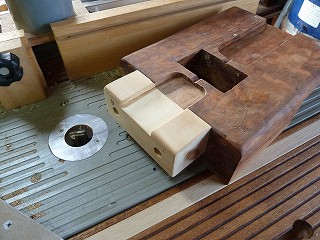
31.I quickly screwed a piece of 2x4 to the saddle and cut grooves with a router. |
32.The symmetrical saddle is complete. |
|
 |
 |
|
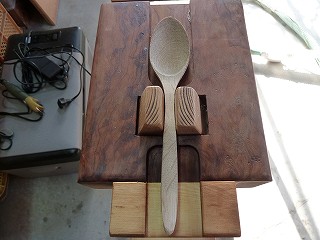
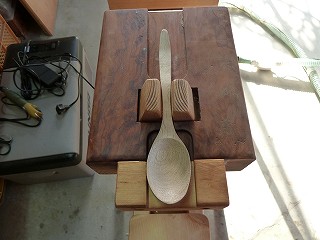
33.The spoon's point is placed in the conventional groove and grasped. |
34.Grip it in the opposite direction. |
|
 |
 |
|
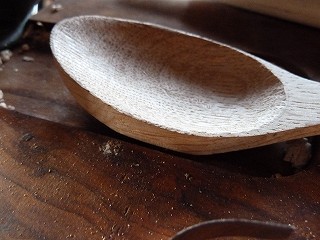
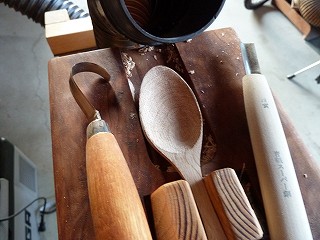
35.Finish shaping with a carving knife. |
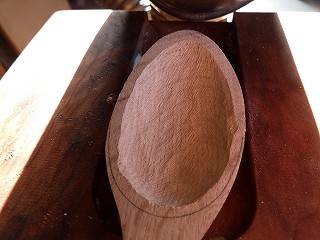
36.Next, sand the recessed area. |
|
 |
 |
|
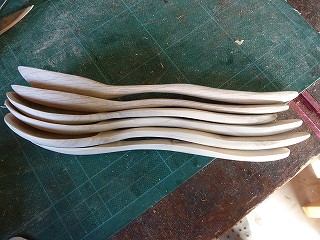
37.The entire surface was sanded using a sponge adapter. |
38.Sanding completed. |
|
 |
 |
|
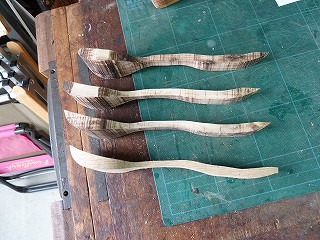
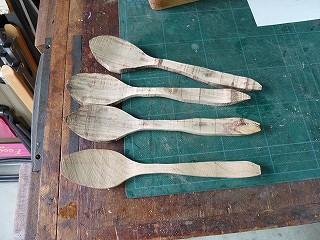
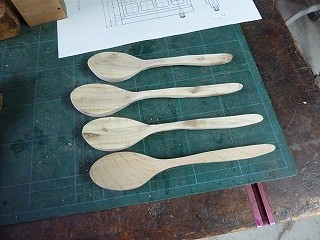
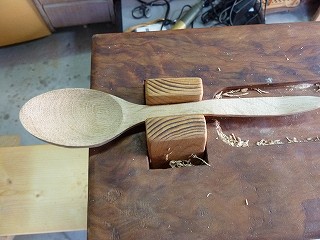
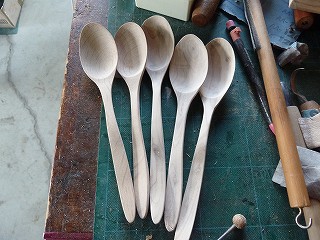
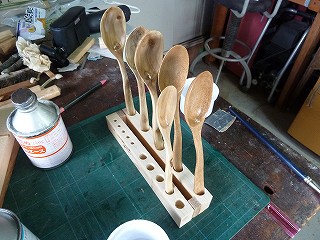
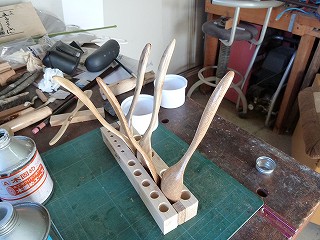
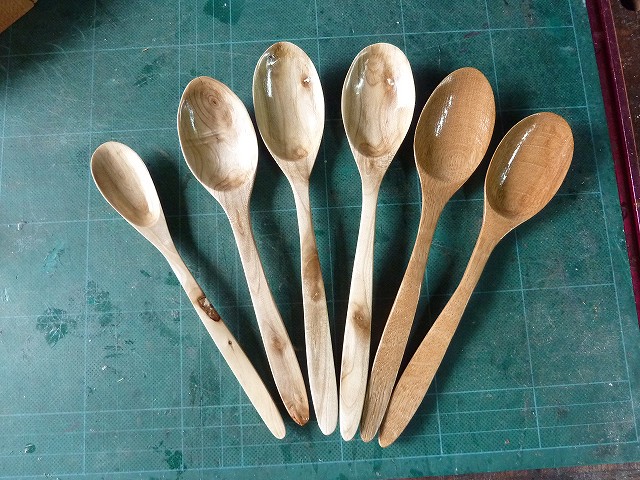
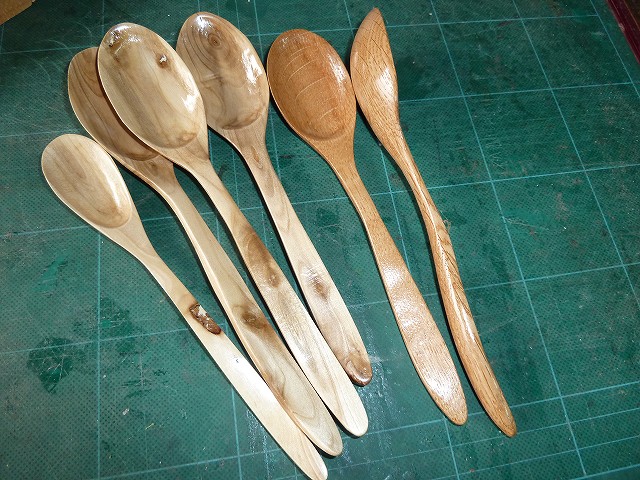
39.The reason there are so many is because we first cut off the unnecessary parts of the timber and made two pieces that are slightly smaller. |
40.This is a smaller spoon. If I had done a better job with the initial markings, I might have been able to get two spoons from one ingredient. |
|
 |
 |
|
41.The paint used was "KIGATAME Ace." |
42.Paint the top part and let it dry. |
|
 |
 |
|
43.Next, paint the grip part and let it dry. This was repeated about 4 times. |
44.Buffing. Tripoli bar first. |
|
 |
 |
|
45.Secondly, the white bar. |
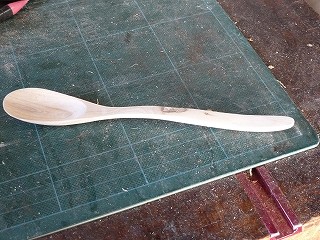
46.Finish with carnauba wax. |
|
 |
||
I think this is a pretty good first handmade spoon. |
||
 |
||
I would like to try it out and give feedback on the shape. |
||