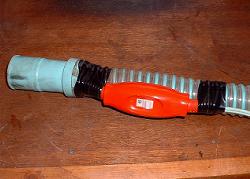
 I attached and used the hand switch for the hose.
However, when connecting a hose with band-saw and slide-saw and using it, I thought that it's hard to use.
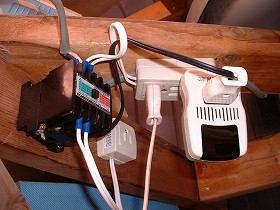
I discovered RAKUTEN[SHOP"infrared remote-control wall socket" accidentally then and it bought it immediately.
It was 1980 yen.However, in the maximum load of the outlet, at 800W, the motor of the cleaner was 1000W.
Therefore, I started a use cleaner in the magnet switch.
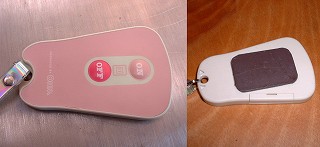
I set a magnet sheet to the reverse of the switch.
Since a switch will adhere to an side of the machine if it does so, it is easy to carry out operation. Moreover, there is also no fear of losing it.
Dust-collecting tank-2
May 30/2004
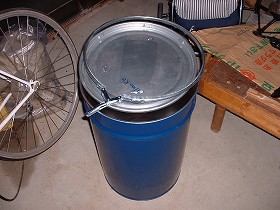 I thought that the tank which was made before had a small capacity.
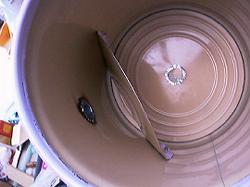
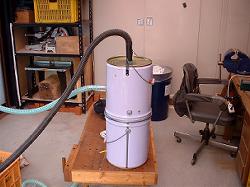
I got a can with 380mmDia*580mmTall and capacity of 65litre, from my friend.
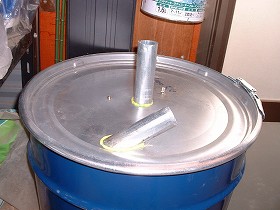
The process is simple.
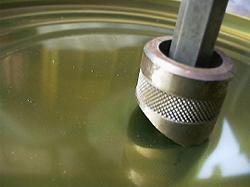
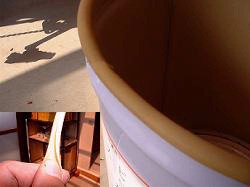
It installs two nozzles in the lid above only.
It is installing an inlet nozzle for the direction of the tangent.
I removed a nozzle from old can which was made before.
It is the glue that is yellow.
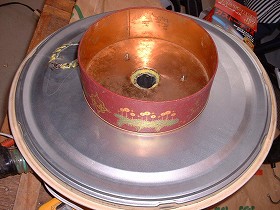
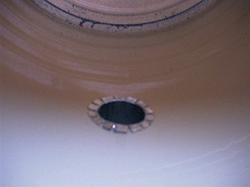
I installed the separator which used the Empty can of the cookie inside the outlet nozzle.
Its effect is unknown.
I using vacuum-cleaner of GTVC-980 by GREATOOL.co. Capacity 1.62m3/min, Vacuum 1600mmAq.
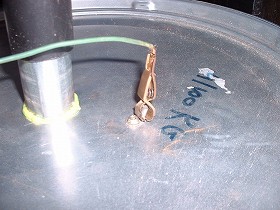
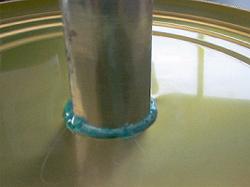
Let's form a ground certainly for coarse particulate explosion prevention.
The point of this clip was grounded and it is connected with the wire further twisted around the outside of a hose.

I using the axial flow fan for the wood lathe.It's secondhand by SUIDEN co.
Model SJF-208-IV. 100V,165W. Capacity 18m3/min.
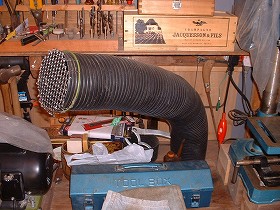
The flexible hose which can be fixed on the free position. It's easy to use.
It puts an extension duct hose to the end of this and band saw and the dust of the sander, too, are exhausting.
I thought that the tank which was made before had a small capacity.I got a can with 380mmDia*580mmTall and capacity of 65litre, from my friend.
The process is simple.
It installs two nozzles in the lid above only.
It is installing an inlet nozzle for the direction of the tangent.
I removed a nozzle from old can which was made before.
It is the glue that is yellow.
I installed the separator which used the Empty can of the cookie inside the outlet nozzle.
Its effect is unknown.
I using vacuum-cleaner of GTVC-980 by GREATOOL.co. Capacity 1.62m3/min, Vacuum 1600mmAq.
Let's form a ground certainly for coarse particulate explosion prevention.
The point of this clip was grounded and it is connected with the wire further twisted around the outside of a hose.
I using the axial flow fan for the wood lathe.It's secondhand by SUIDEN co.
Model SJF-208-IV. 100V,165W. Capacity 18m3/min.
The flexible hose which can be fixed on the free position. It's easy to use.
It puts an extension duct hose to the end of this and band saw and the dust of the sander, too, are exhausting.
Dust-collecting tank-1
Oct. 14/2002
 I made Dust-collecting tank of the cleaner.
Because, the tank of the cleaner becomes full immediately.
The material is 1.2 m of rubber hoses with two pail cans of 20 liters and 6 mm caliber.
The pail can is a clamp specification in the one with the lid.
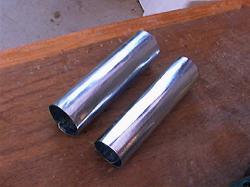
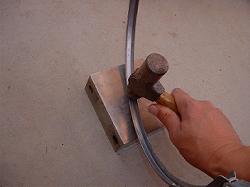
I makes a hose connection mouth first almost.
It rounds and it solders a 0.5 mm steel sheet.
Next, I makes a hole in the bottom of the pail can and shell.
I used a chassis punch but it can do a drill and scissors
I installs the connection mouth which was made first.
The inside is such a sensation.
I solders.
I completed the outside with Grew gun.
It is for the wish.
I put baffle plate inside the pail can.
It used the lid of the pail can.
The baffle plate prevents dust's short cut passing.
Also, let's change a handle, too, because the side of the bottom becomes the top.
In this, the manufacture of the 1st can is ending.
I covered the 6 mm rubber hose which was opened on the pail can which becomes an underside ( the part of the edge ).
It glues it together at the can.
This rubber hose does the duty of the gasket.
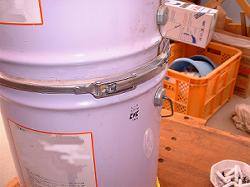
I used the clamp which the lid had for the connection of two Paer cans.
But, it spreads a clamp by beating it with the hammer. Because it doesn't fit.
The photograph connected two pail cans just now.
The dust enters from the side of the can above and collects at the can below.
The top nozzle inserts a hose on the side of the cleaner.
I am hanging and using it from the beam.
I made Dust-collecting tank of the cleaner.Because, the tank of the cleaner becomes full immediately.
The material is 1.2 m of rubber hoses with two pail cans of 20 liters and 6 mm caliber.
The pail can is a clamp specification in the one with the lid.
I makes a hose connection mouth first almost.
It rounds and it solders a 0.5 mm steel sheet.
Next, I makes a hole in the bottom of the pail can and shell.
I used a chassis punch but it can do a drill and scissors
I installs the connection mouth which was made first.
The inside is such a sensation.
I solders.
I completed the outside with Grew gun.
It is for the wish.
I put baffle plate inside the pail can.
It used the lid of the pail can.
The baffle plate prevents dust's short cut passing.
Also, let's change a handle, too, because the side of the bottom becomes the top.
In this, the manufacture of the 1st can is ending.
I covered the 6 mm rubber hose which was opened on the pail can which becomes an underside ( the part of the edge ).
It glues it together at the can.
This rubber hose does the duty of the gasket.
I used the clamp which the lid had for the connection of two Paer cans.
But, it spreads a clamp by beating it with the hammer. Because it doesn't fit.
The photograph connected two pail cans just now.
The dust enters from the side of the can above and collects at the can below.
The top nozzle inserts a hose on the side of the cleaner.
I am hanging and using it from the beam.